Search result
Settings
You can make detailed settings for the network.
To change the network environment, perform “Quick Setup”. (For details on the operations, see the separate “Quick Start Guide”.)
If you are using a broadband router (DHCP function), there is no need to make the settings at “IP Address” and “Proxy”, since the DHCP function is set to “On” in this unit’s default settings.
Only set “Settings” when connecting to a network without a DHCP function.
Wired Setup
DHCP
Selects how to connect to the network.
|
On
|
Configure the network settings automatically from your router. |
|
Off: |
Configure the network settings manually. |
IP Address
Set the IP address within the ranges shown below.
The Network Audio function cannot be used if other IP addresses are set.
CLASS A: 10.0.0.1 - 10.255.255.254
CLASS B: 172.16.0.1 - 172.31.255.254
CLASS C: 192.168.0.1 - 192.168.255.254
Subnet Mask
When connecting an xDSL modem or connector adapter directly to this unit, input the subnet mask indicated in the documentation supplied by your provider. Normally input 255.255.255.0.
Gateway
When connected to a gateway (router), input its IP address.
Primary DNS, Secondary DNS
If there is only one DNS address indicated in the documentation supplied by your provider, enter it for “Primary DNS”. If two or more DNS are provided by your provider, enter one for “Secondary DNS”.
Proxy
Make this setting when connecting to the Internet via a proxy server.
Make the proxy settings only when you connect to the Internet via a proxy server that is on your internal network or provided by your provider, etc.
|
Proxy (Off) or Proxy (On): |
Set the proxy server. |
|
Proxy (Address) or Proxy (Name): |
Select when inputting by address or domain name. |
|
Address or Name: |
Inputting address or domain name. Up to 38 characters can be input. |
|
Port: |
Enter port number. |
If you cannot connect to the Internet, recheck the connections and settings. link
If you do not understand about Internet connection, contact your ISP (Internet Service Provider) or the store from which you purchased your computer.
Wi-Fi Setup Method
In this menu, Wi-Fi settings and connections can be made using any of the five connection methods.
|
Auto-Scan /Share Wi-Fi setting from an iOS device / WPS (Wi-Fi Protected Setup) / Web Browser Setup / Manual |
If a LAN cable is connected, remove it.
See the Quick Setup Guide for details on how to connect to Wi-Fi using the Wi-Fi CONNECT button on the rear panel.
Auto-Scan
This automatically searches for networks.
From the list of the networks, select the one you want to connect to.
Select “Rescan” if the network cannot be found.
Make the following settings.
Share Wi-Fi setting from an iOS device
You can use an iOS device such as an iPhone or iPad to configure Wi-Fi settings.
After selecting this item, select Settings/Wi-Fi from the iOS device home screen, select “Denon DNP-730AE” displayed at the bottom of the screen, and then follow the setting instructions displayed on the iOS device.
For details, see the “Quick Start Guide”.
The iOS version must be 7 or later.
WPS (Wi-Fi Protected Setup)
Register the PIN code of the unit in the router.
Web Browser Setup
Use a web browser to set up Wi-Fi.
A Wi-Fi device that can perform web browse operations is required.
Read the precautions on the screen, and press ENTER.
Select “Denon DNP-730AE” from the Wi-Fi network list of the Wi-Fi device.
The IP address (192.168.1.16) appears on the unit.
Enter the IP address of this unit in browser’s address box.
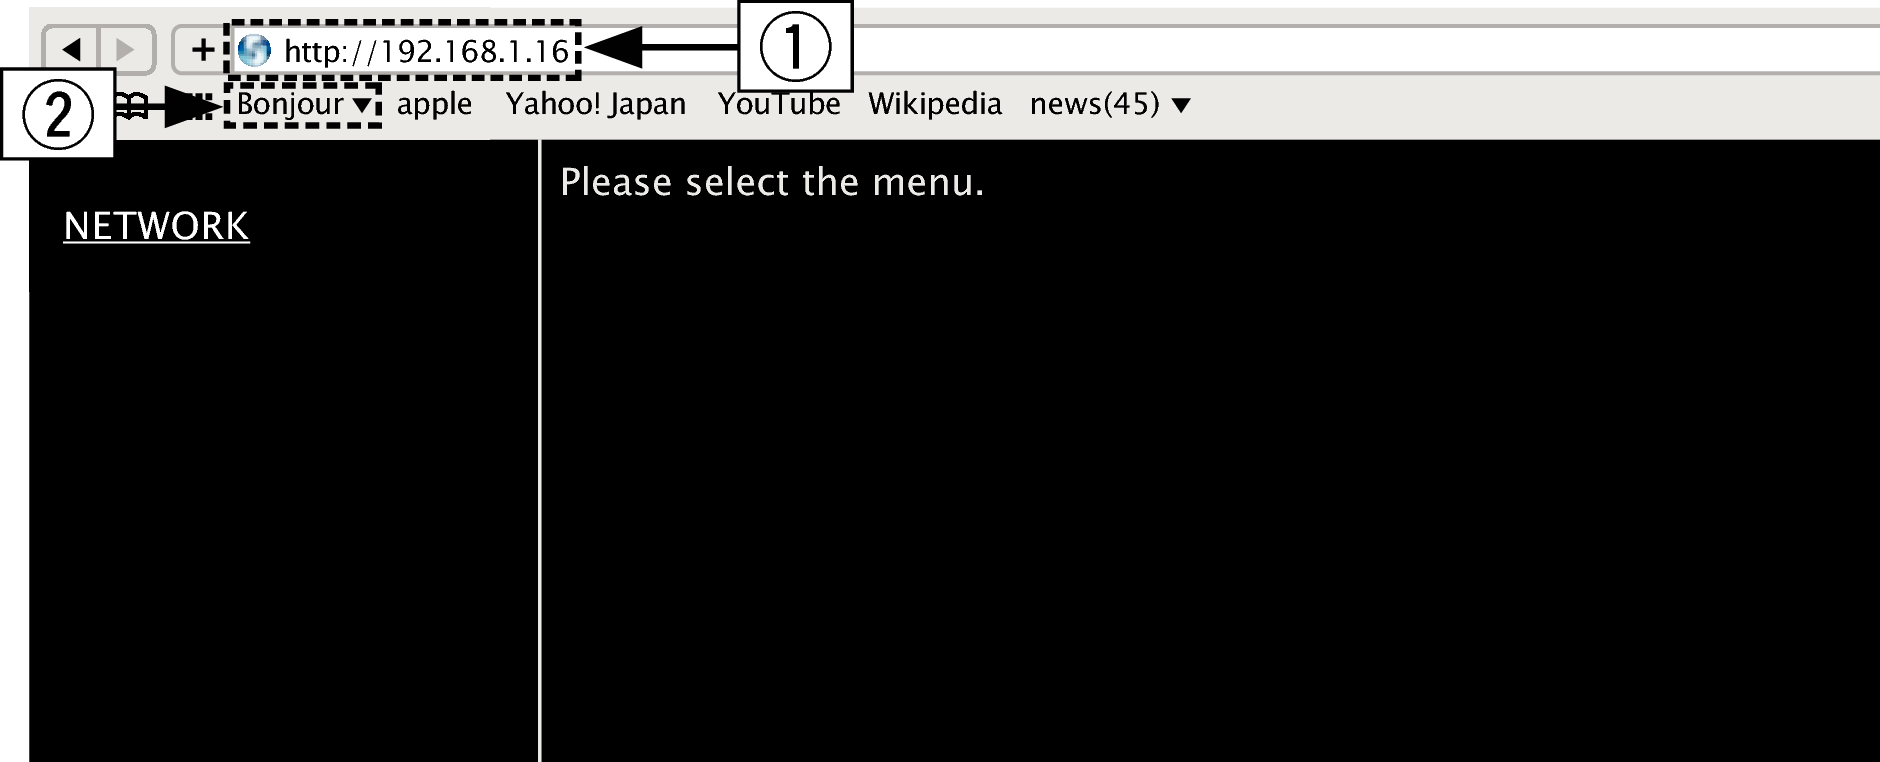
Entering the IP address (192.168.1.16).
If you are using the Safari web browser, you can select “Bonjour” and directly access the unit’s web control screen from the overview section.
When the top menu is displayed, click “NETWORK”.
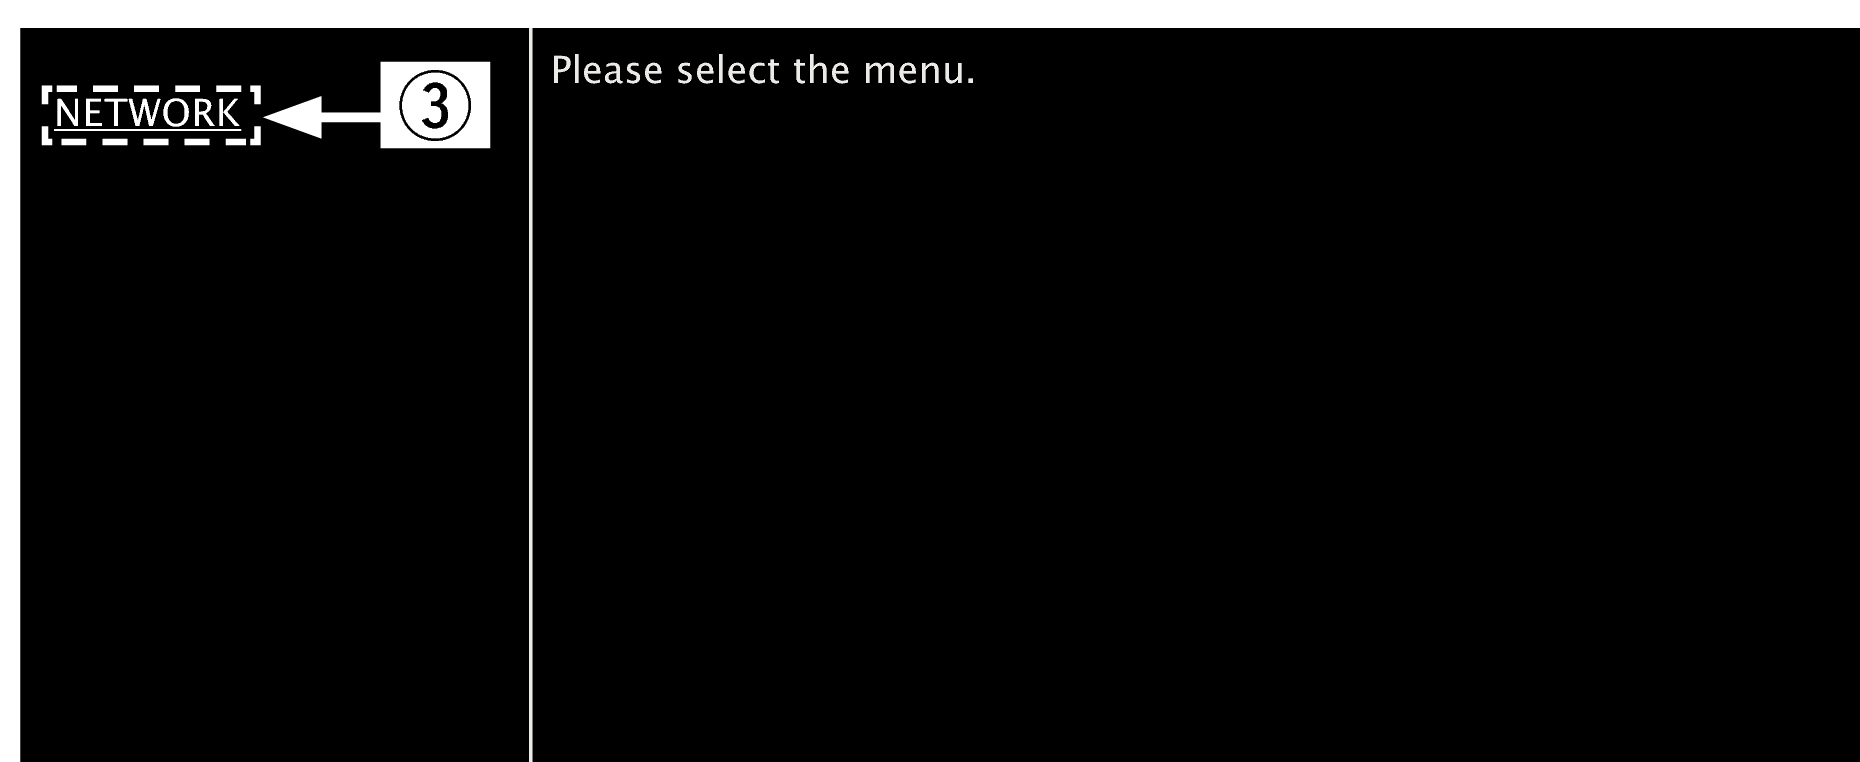
Click “NETWORK”. ( 
 Example 1
  )
)
Example 1 )Operate.
Example 1 Network Setting 1
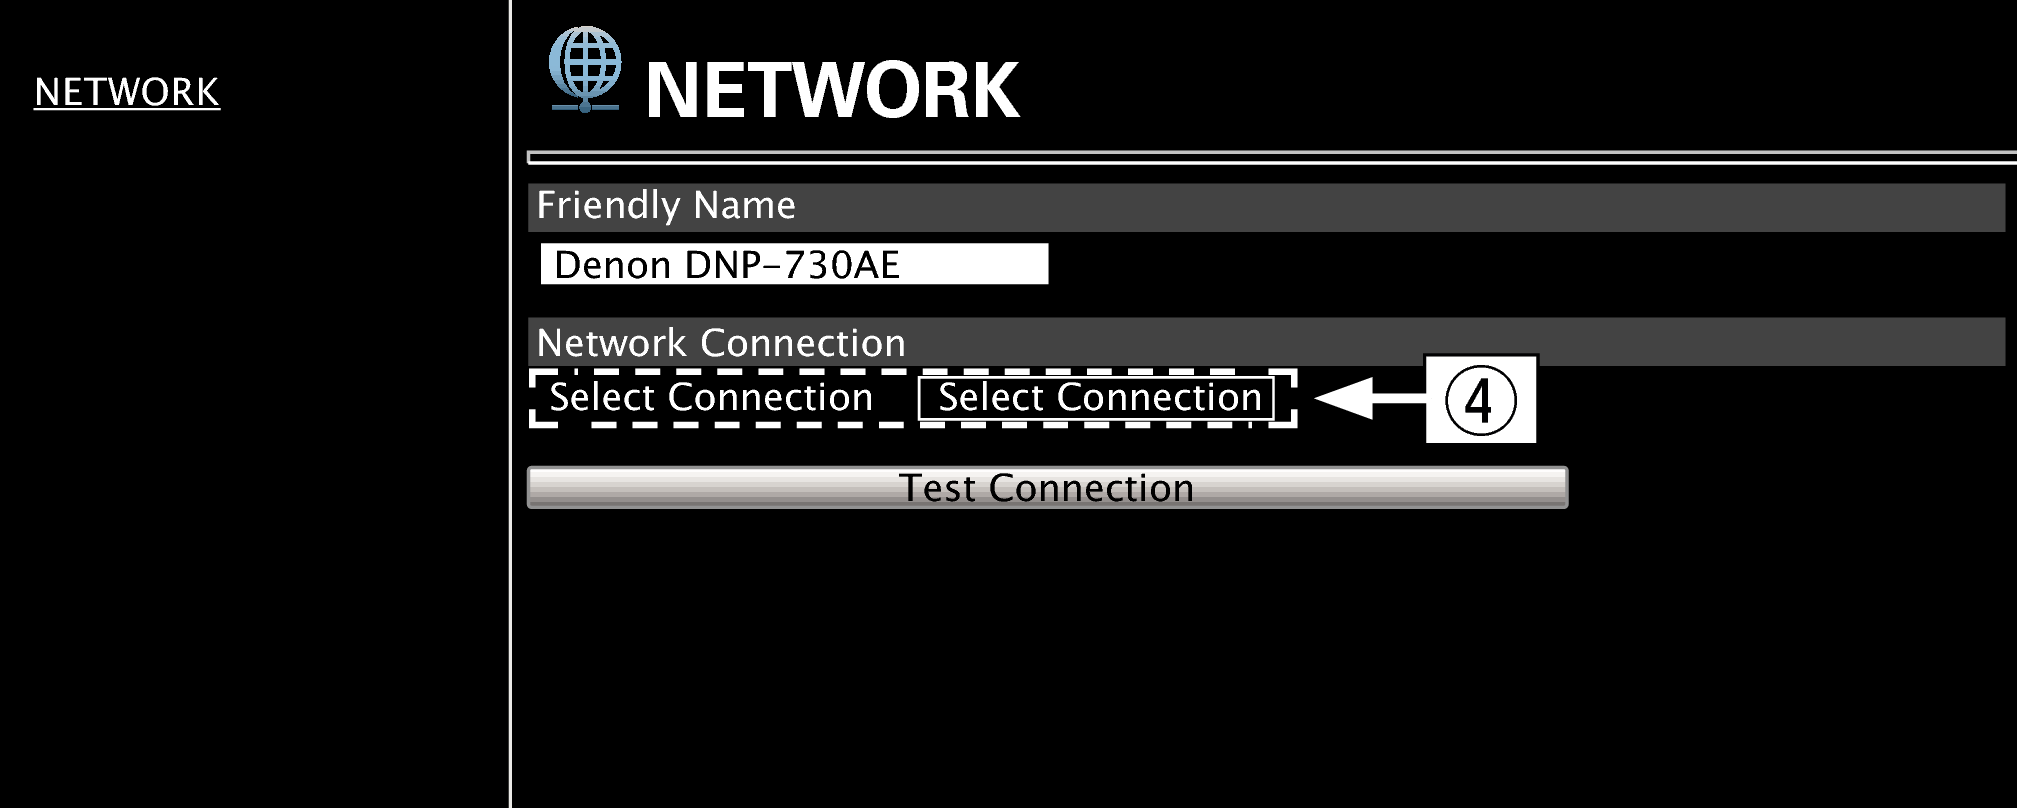
Network connection settings
Click to change the network connection method. If you select “Wi-Fi”, a new item will appear on-screen.
( Example 2 )
(
Example 2 ) Example 2 Network Setting 2
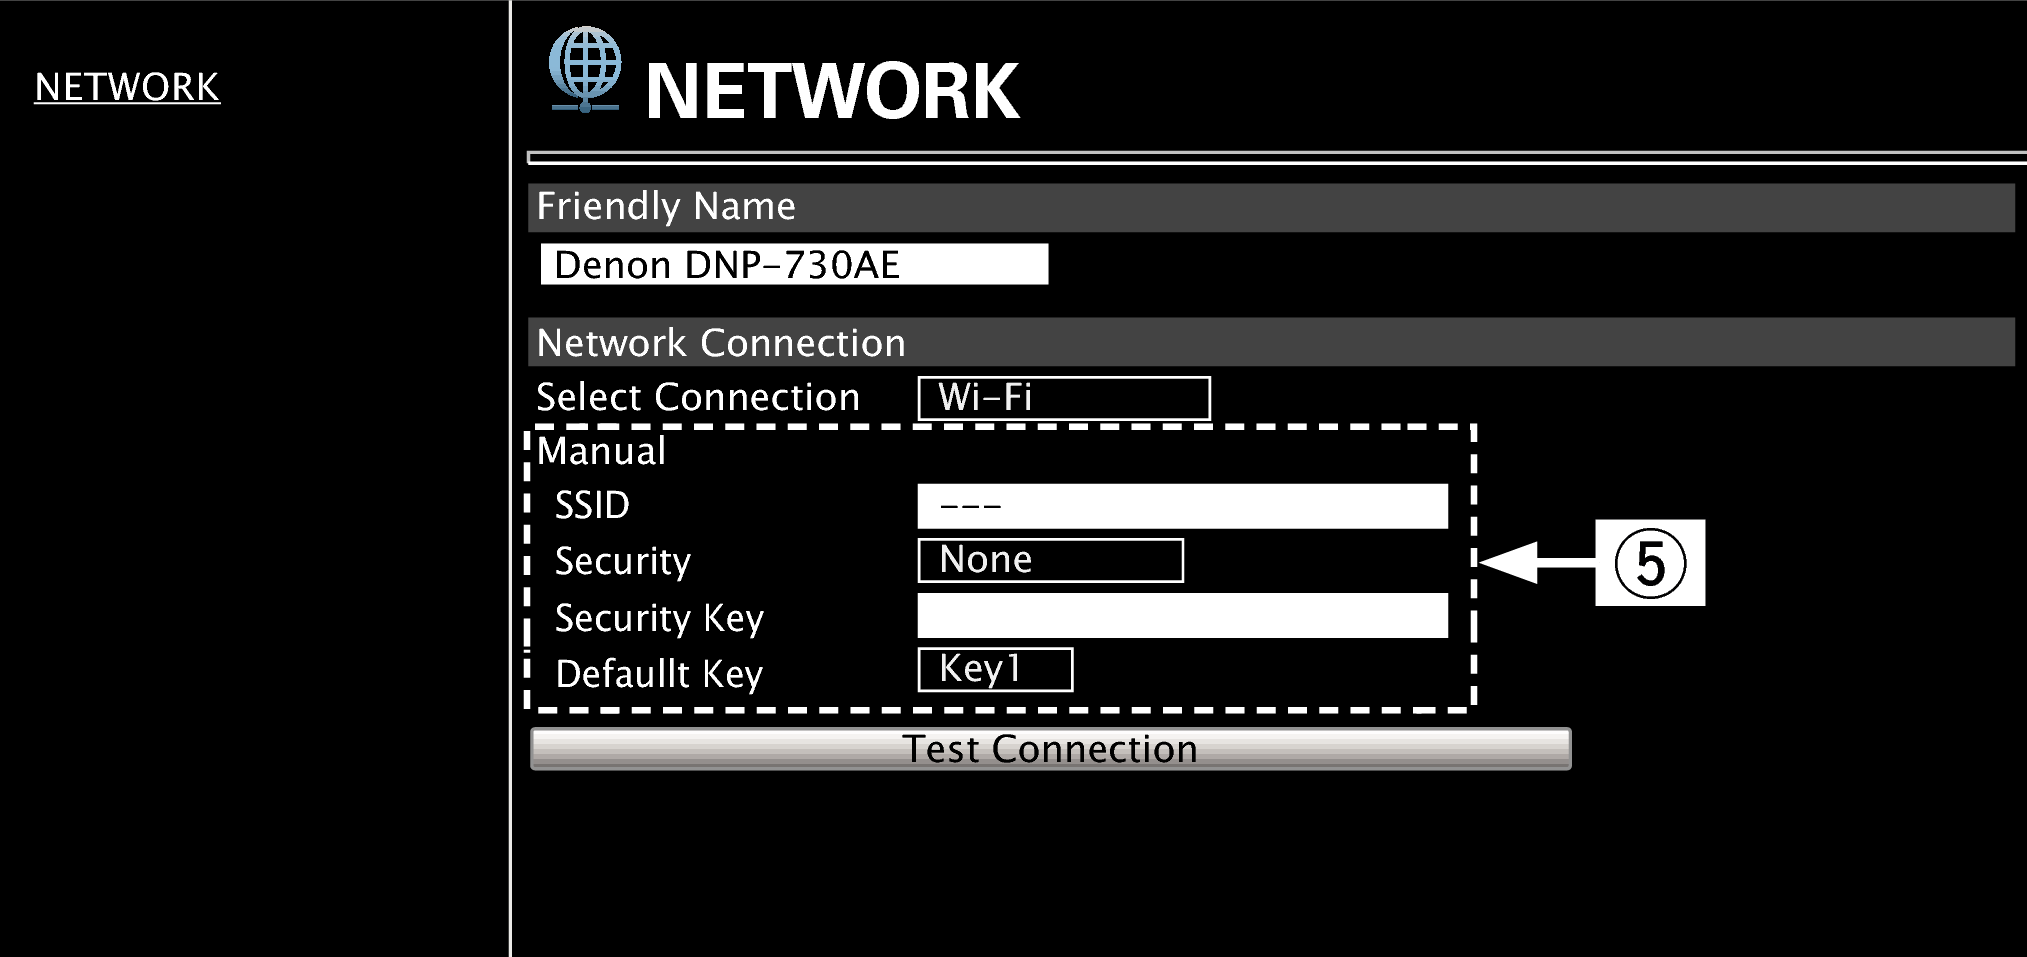
Network connection settings
Example 2 - Displayed when “Wi-Fi” is selected in  . Select or input items as necessary, and then click “Test Connection” to apply the changes.
Items displayed may vary depending on selected items and connection status.
After selecting each item, wait a moment for the display to be updated.
To apply network connection settings, click “Test Connection” after making changes.
Manual
Sets the wireless connection manually
|
SSID : |
Input the name of the wireless network (SSID). |
|
Security: |
Select the encryption method according to the encryption setting of the access point you are using. |
|
Default Key: |
Select the Default Key. When connecting to a “WEP” encrypted network, “Default Key” menu is displayed. |
|
Password: |
Input the password. |
|
DHCP/Proxy: |
|
|
Test Connection: |
Test the connection. |