Search result
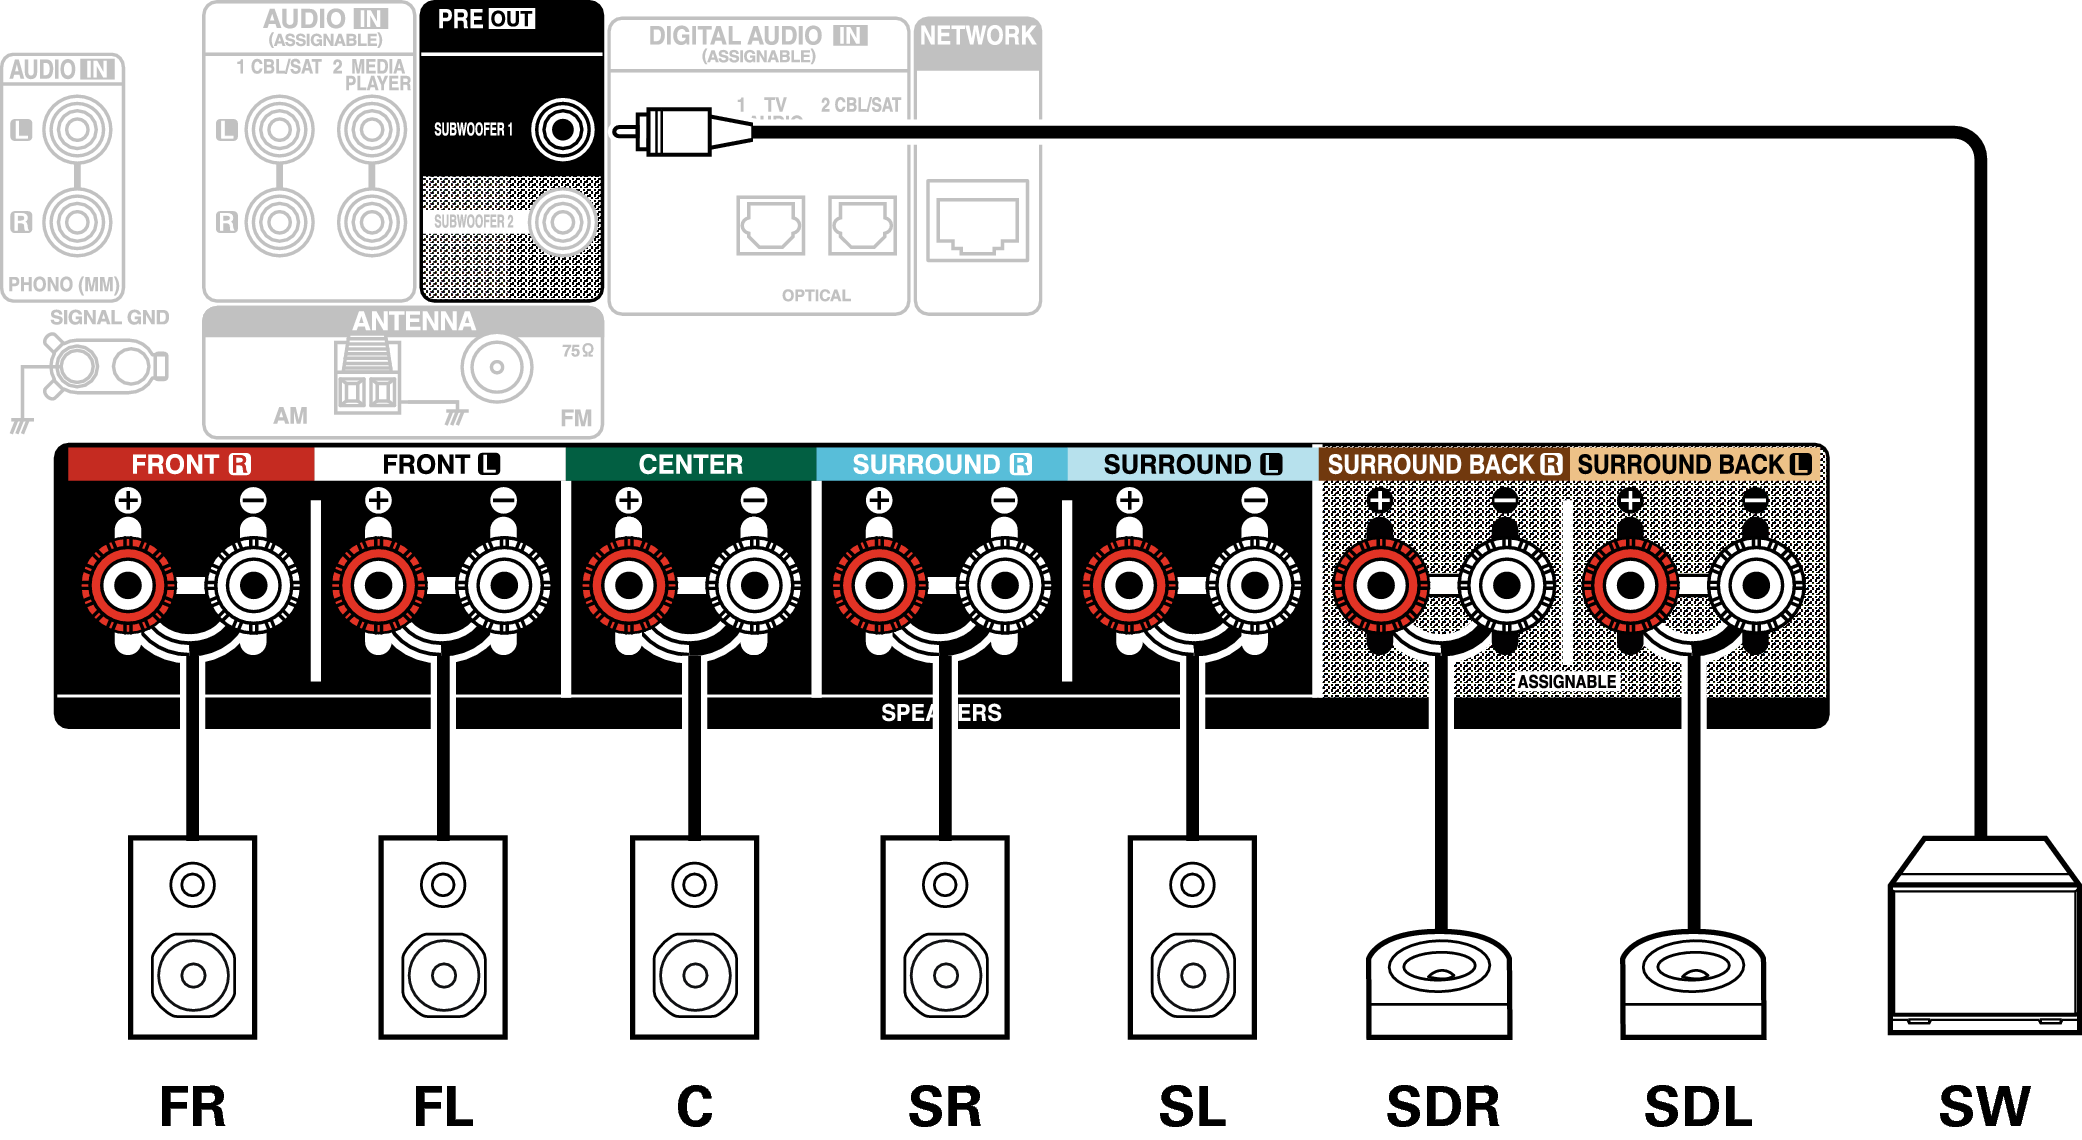
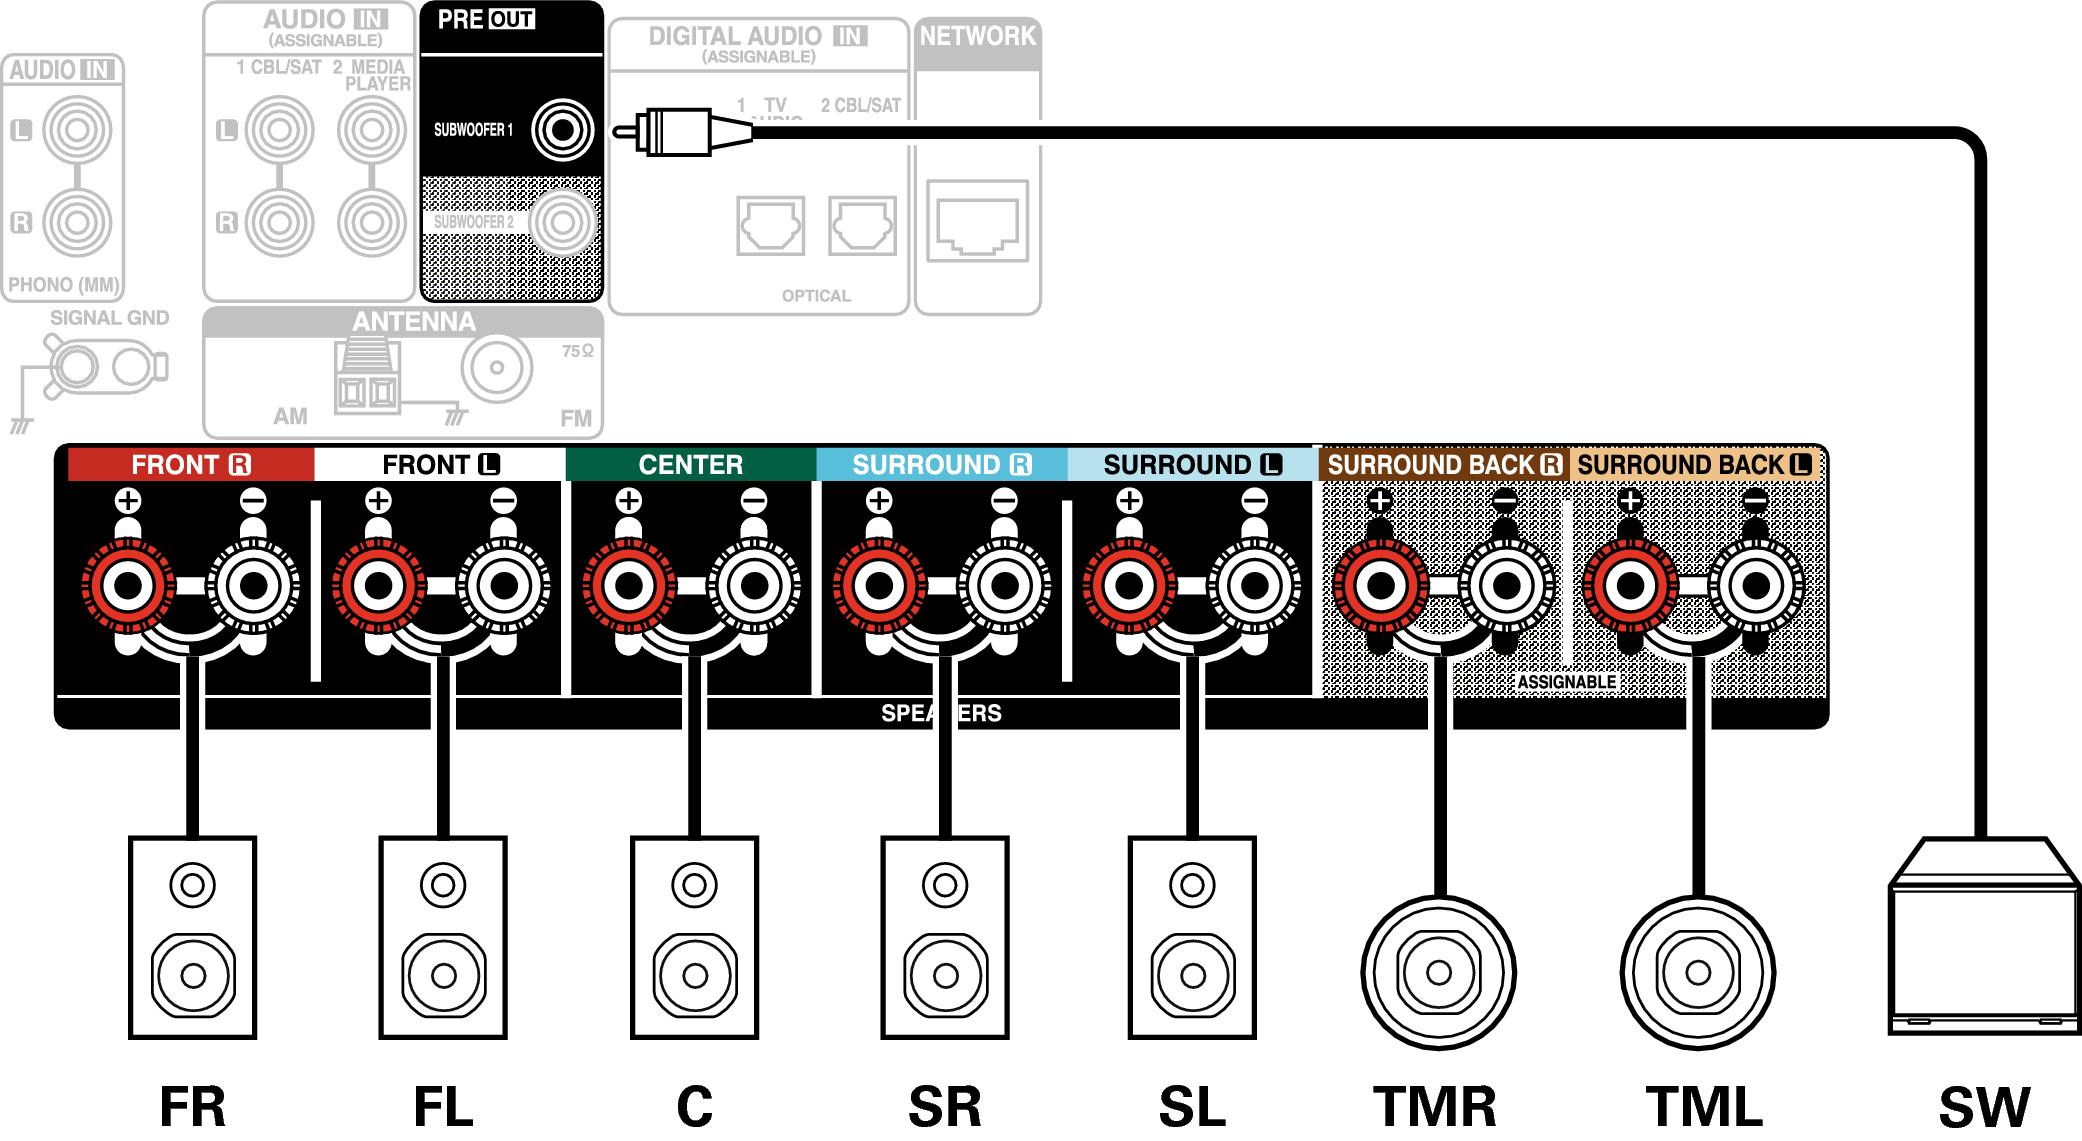
Connecting 7.1-channel speakers
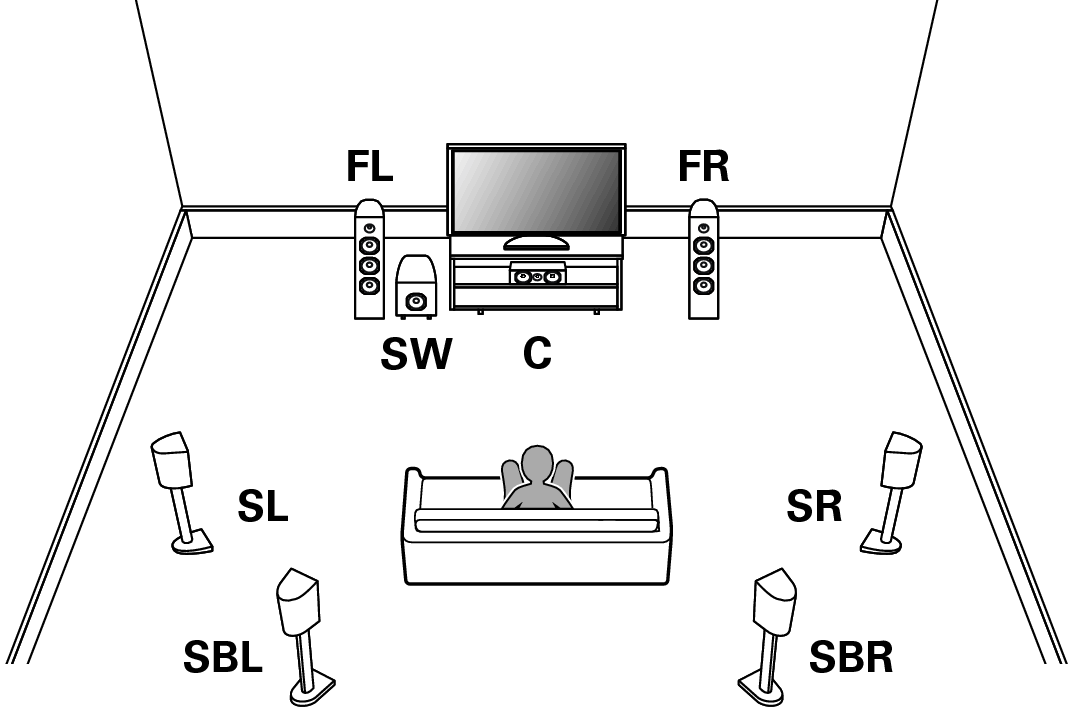
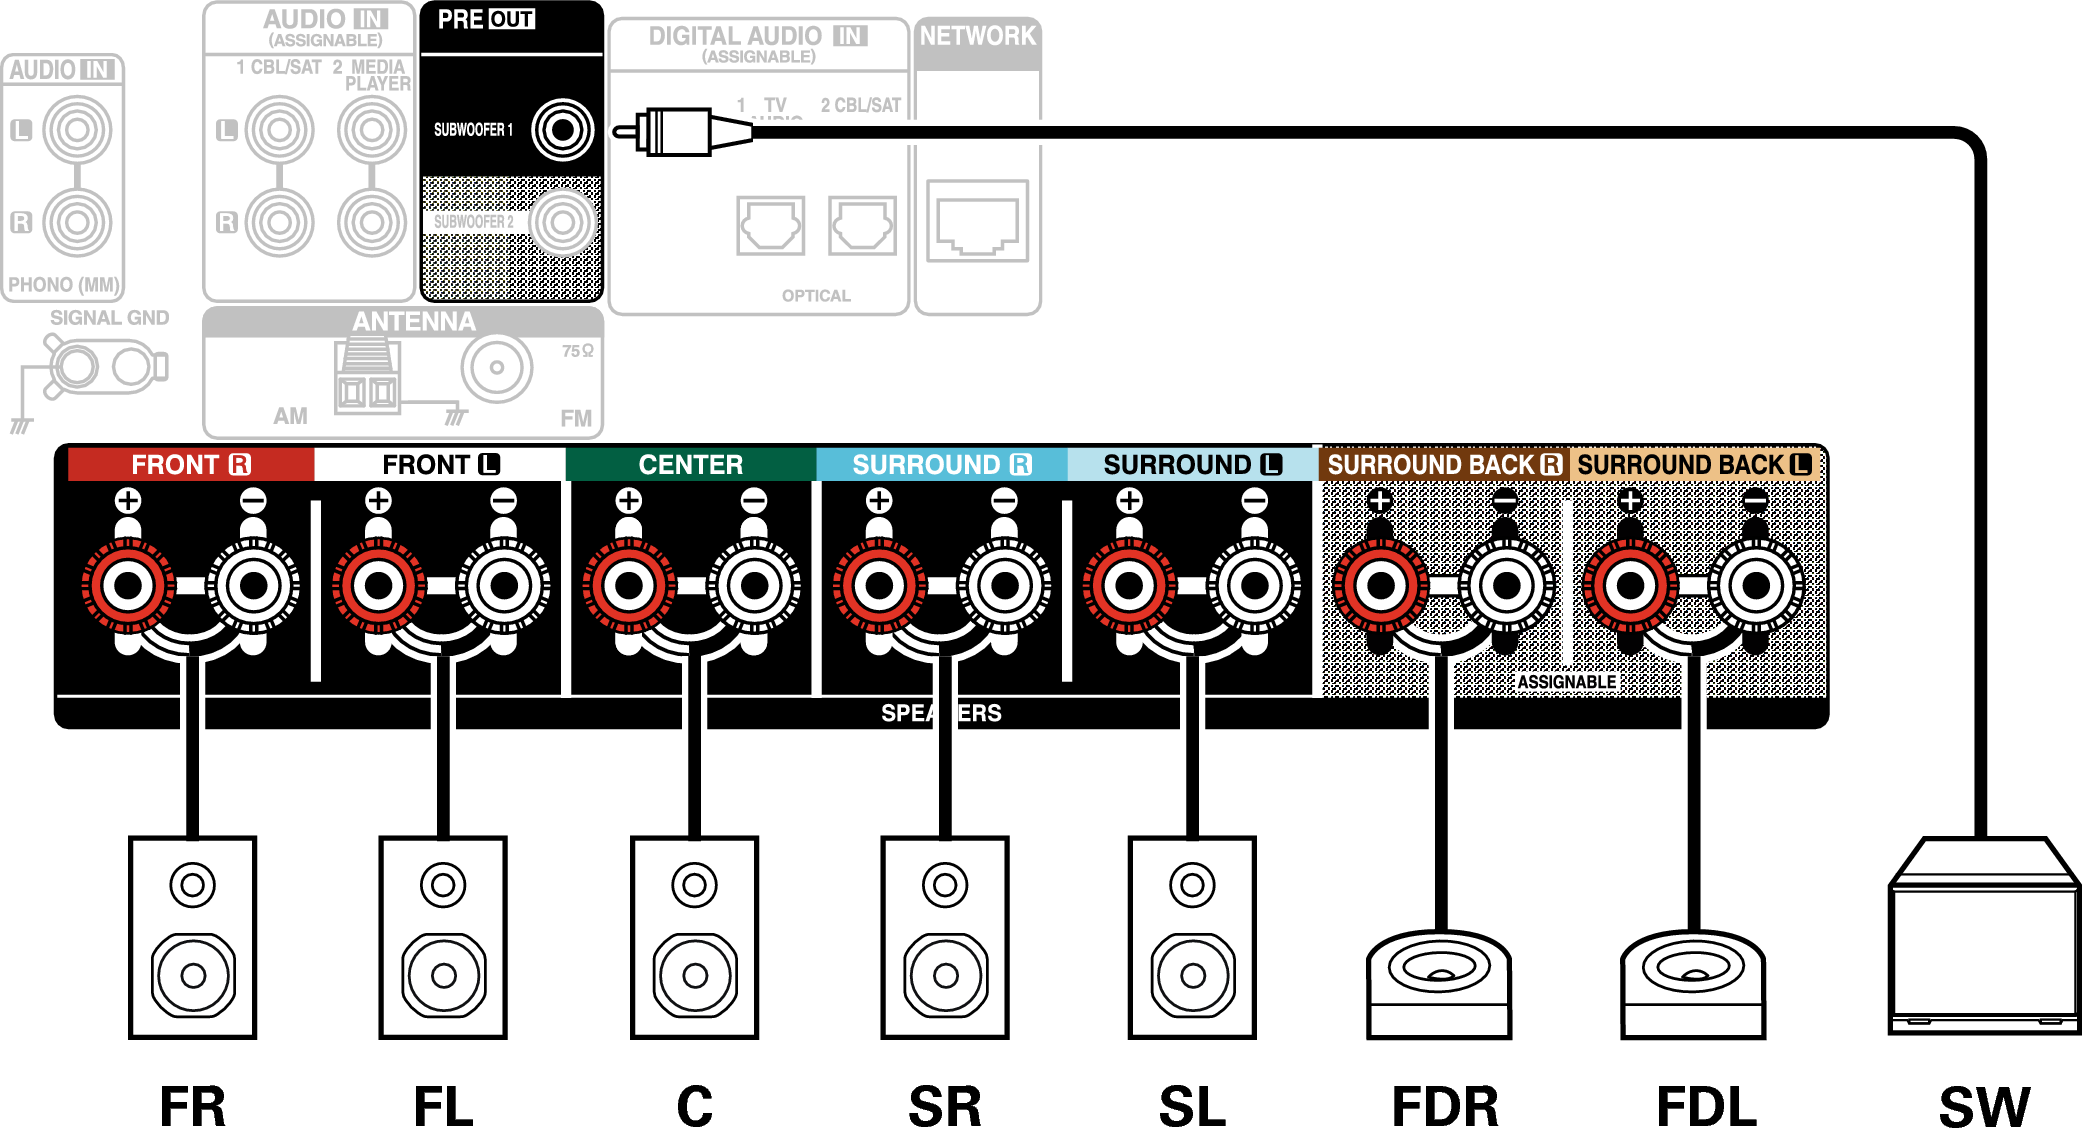
Example layout when using surround back speakers
This 7.1-channel surround system is basic 7.1-channel system.
(Adding surround back speakers to basic 5.1-channel system)
For each speaker connection, refer to the following.
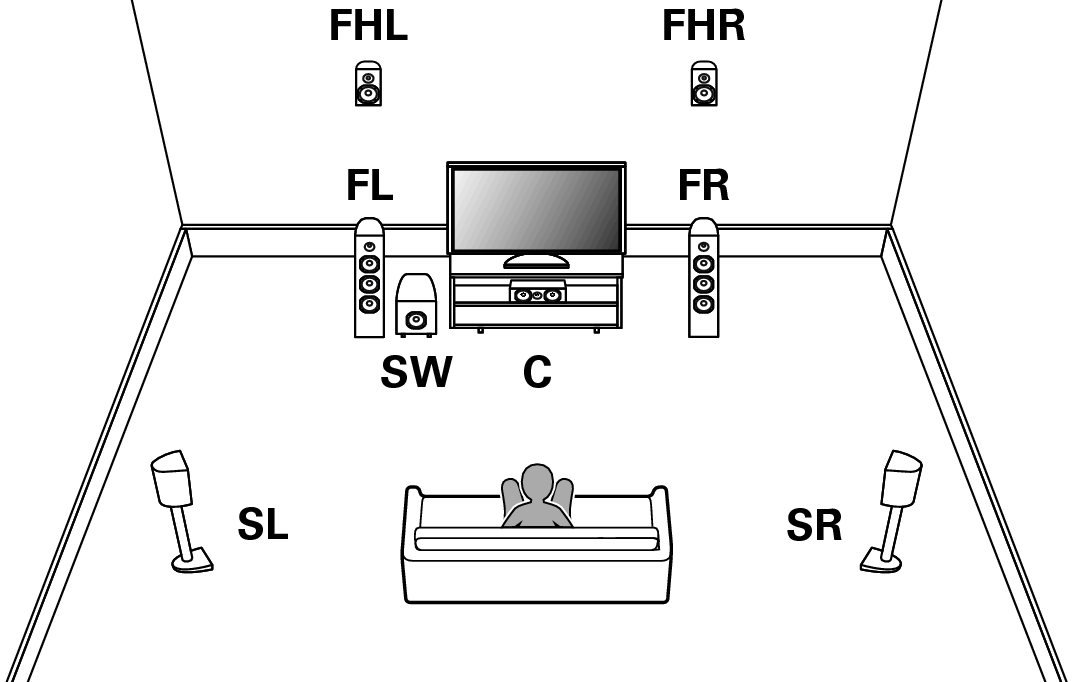
Example layout when using height speakers
This 7.1-channel surround system is the same as a basic 5.1-channel system but with front height speakers.

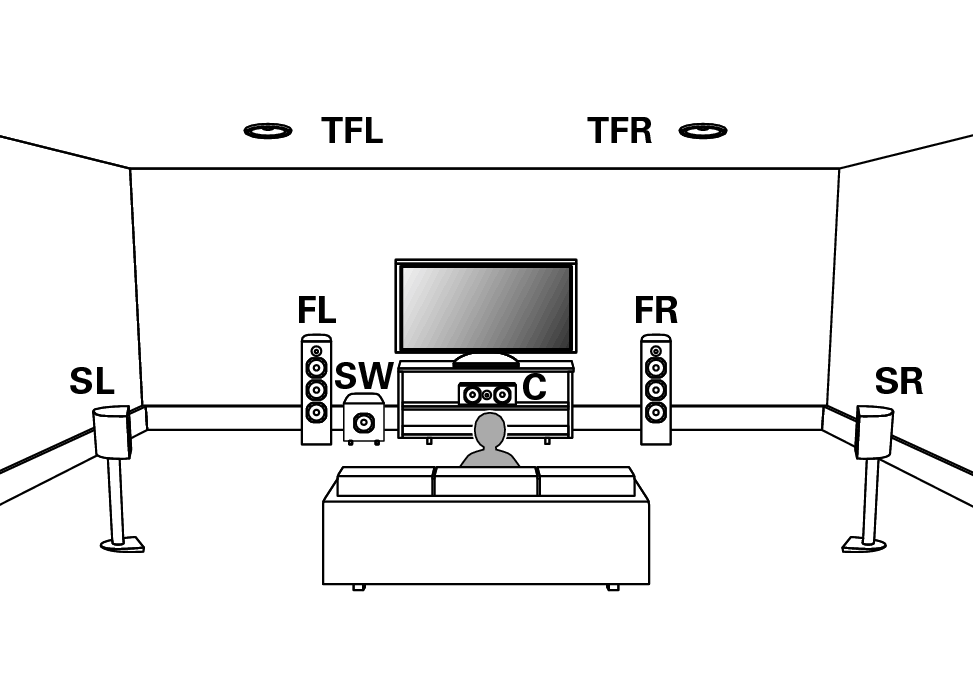
Example layout when using top front speakers
This 7.1-channel surround system is the same as a basic 5.1-channel system but with top front speakers.

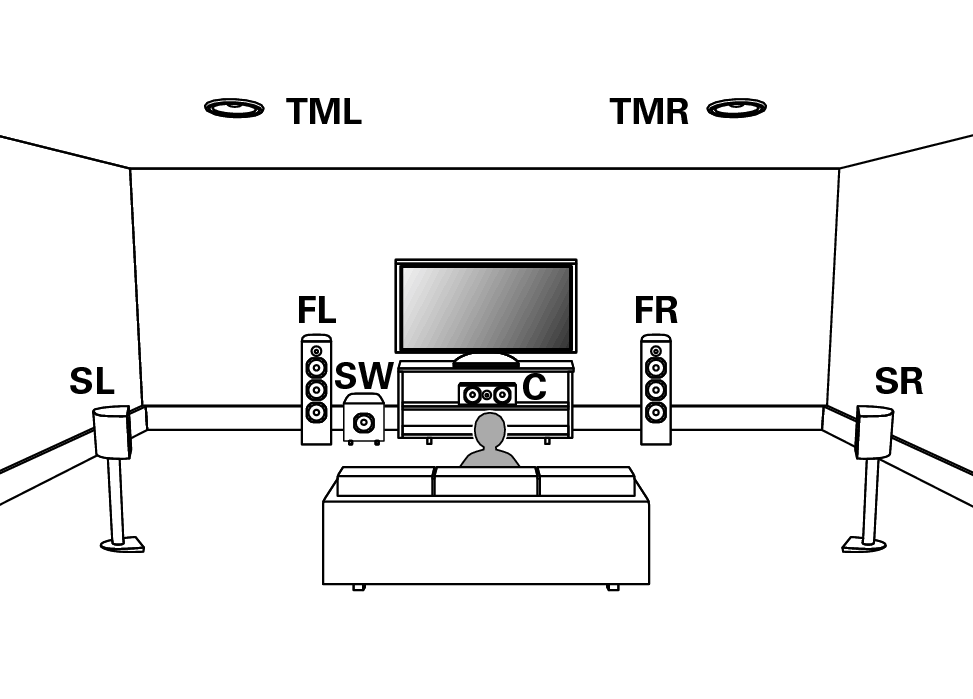
Example layout when using top middle speakers
This 7.1-channel surround system is the same as a basic 5.1-channel system but with top middle speakers.
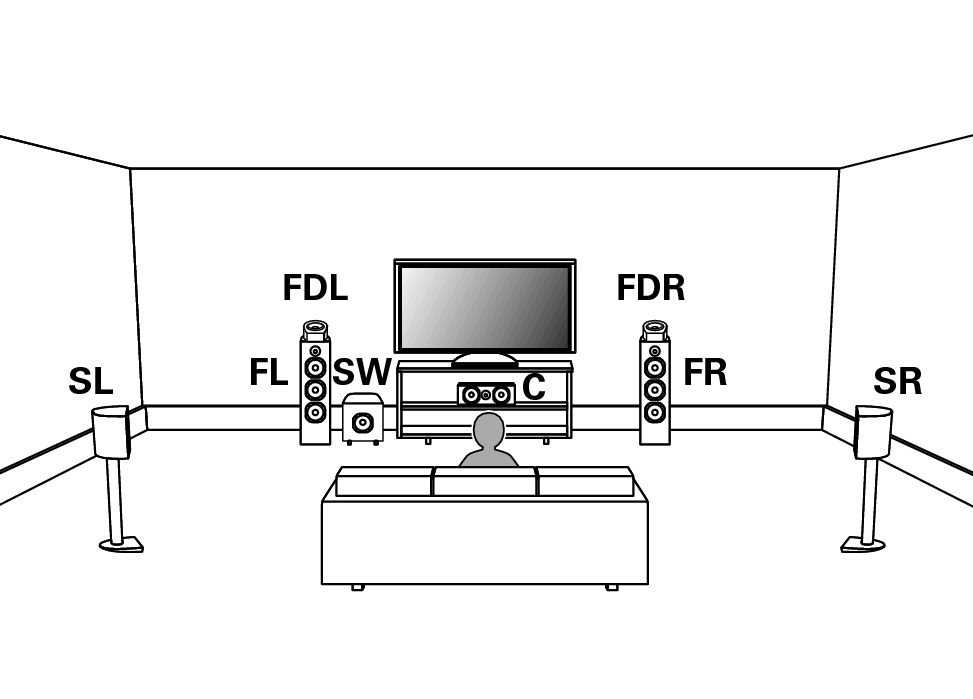
Example layout when using front Dolby Atmos Enabled speakers
This 7.1-channel surround system is the same as a basic 5.1-channel system but with front Dolby Atmos Enabled speakers.
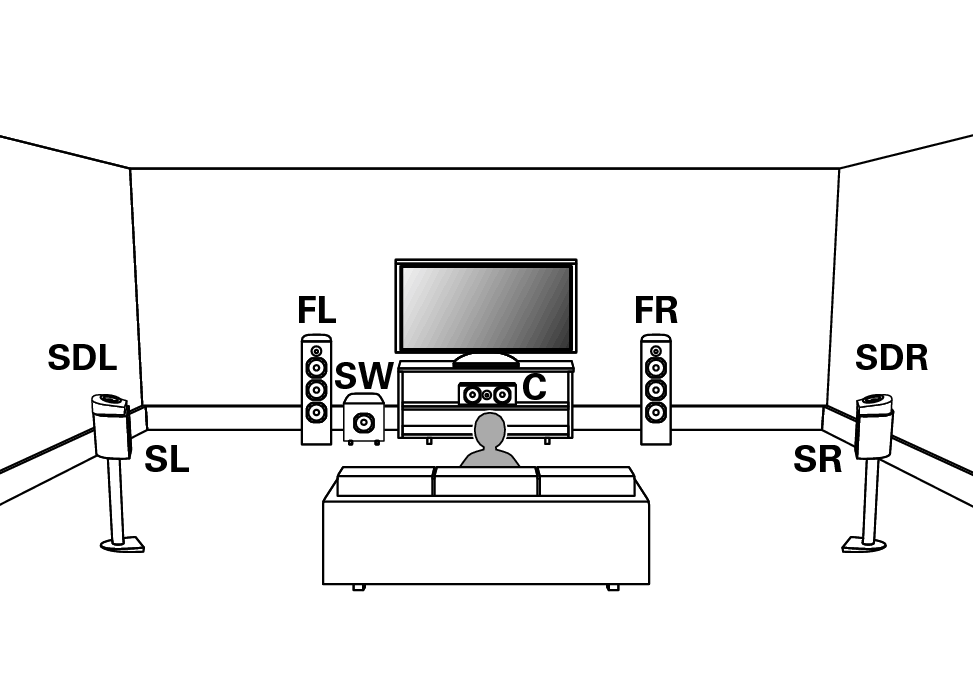
Example layout when using surround Dolby Atmos Enabled speakers
This 7.1-channel surround system is the same as a basic 5.1-channel system but with surround Dolby Atmos Enabled speakers.