Controlling the unit from a web control
Switch the “Network Control” setting to “On”. link
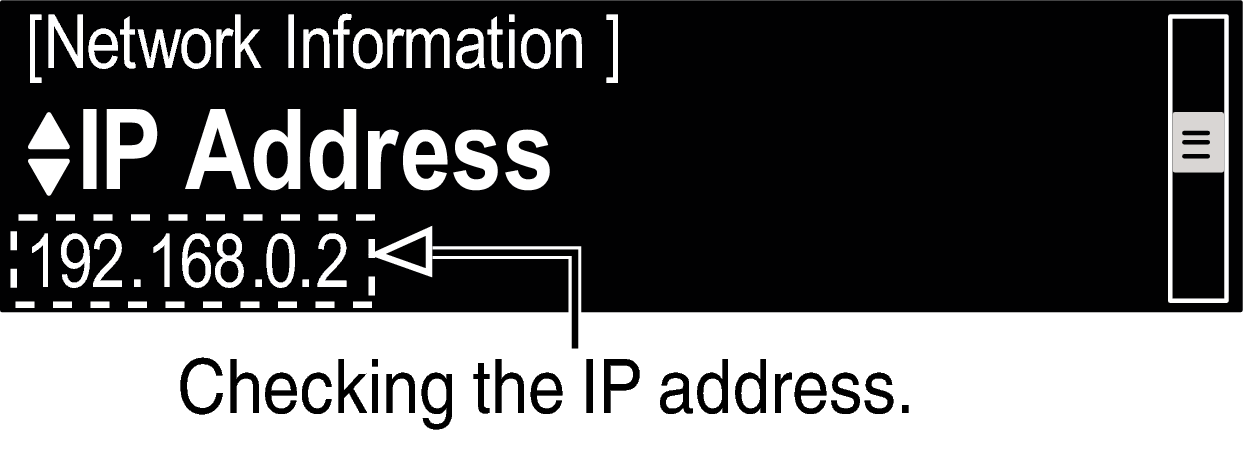
Check the IP address of this unit with “Network Information”. link
Start up the web browser.
Enter the IP address of this unit in browser’s address box.
For example, if the IP address of this unit is “192.168.0.2”, enter “http://192.168.0.2”.
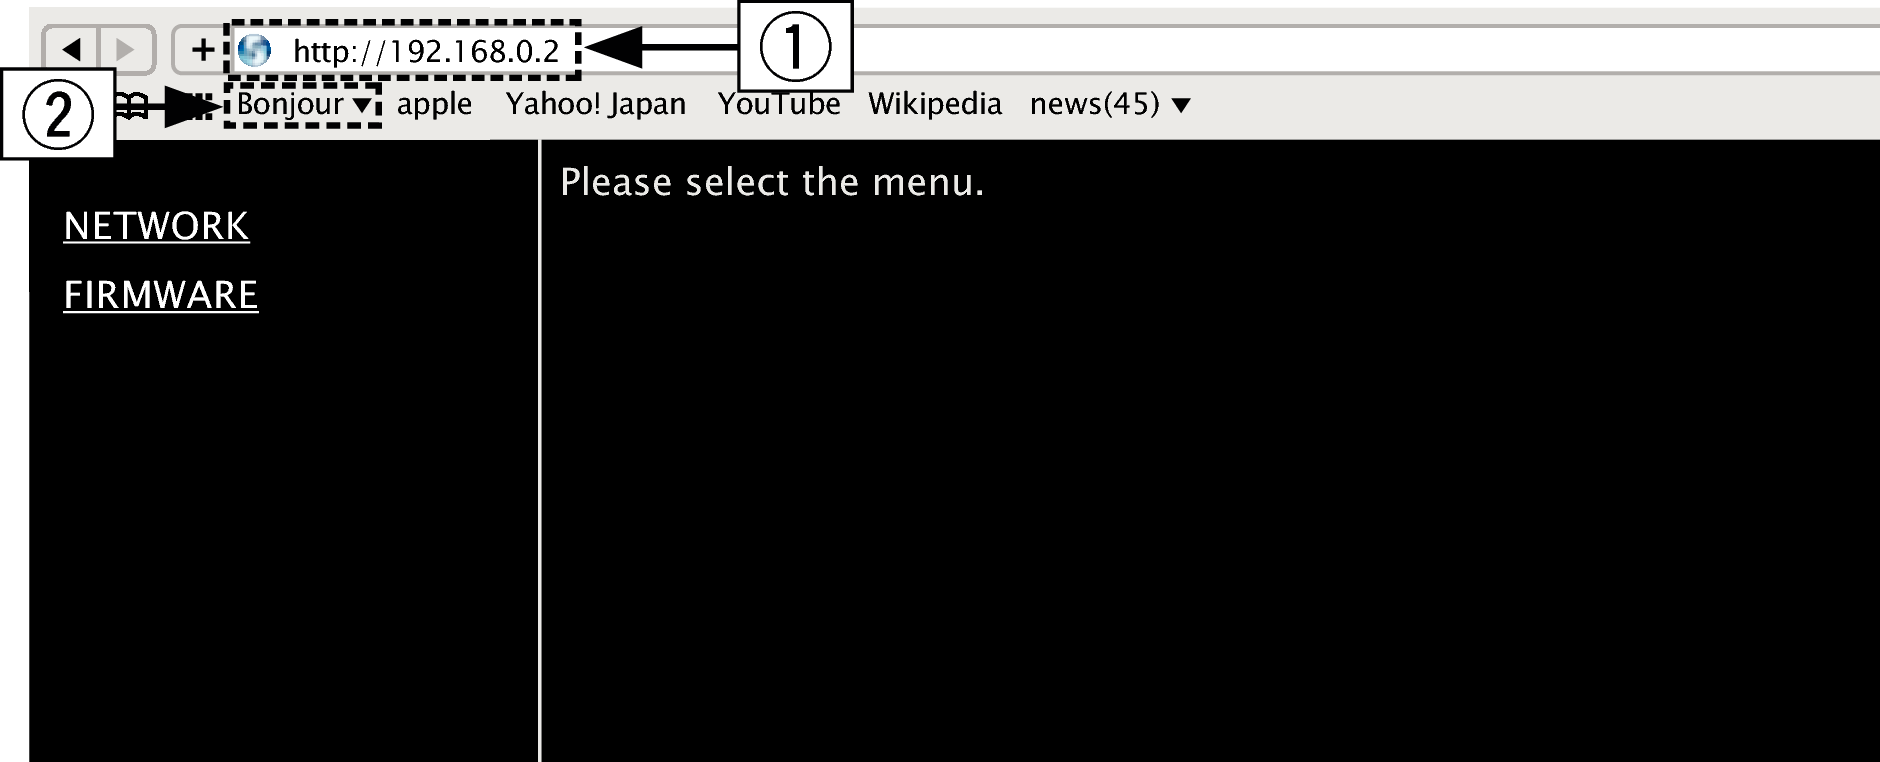
Entering the IP address.
If you are using the Safari web browser, you can select “Bonjour” and directly access the unit’s web control screen from the overview section.
By adding this unit’s IP address to the browser’s bookmark, you can display the web control screen using the bookmark function the next time you use the browser. If you are using a DHCP server and “Network Control” link is set to “Off”, turning the power on/off changes the IP address.
When the top menu is displayed, click on the menu item you want to operate.
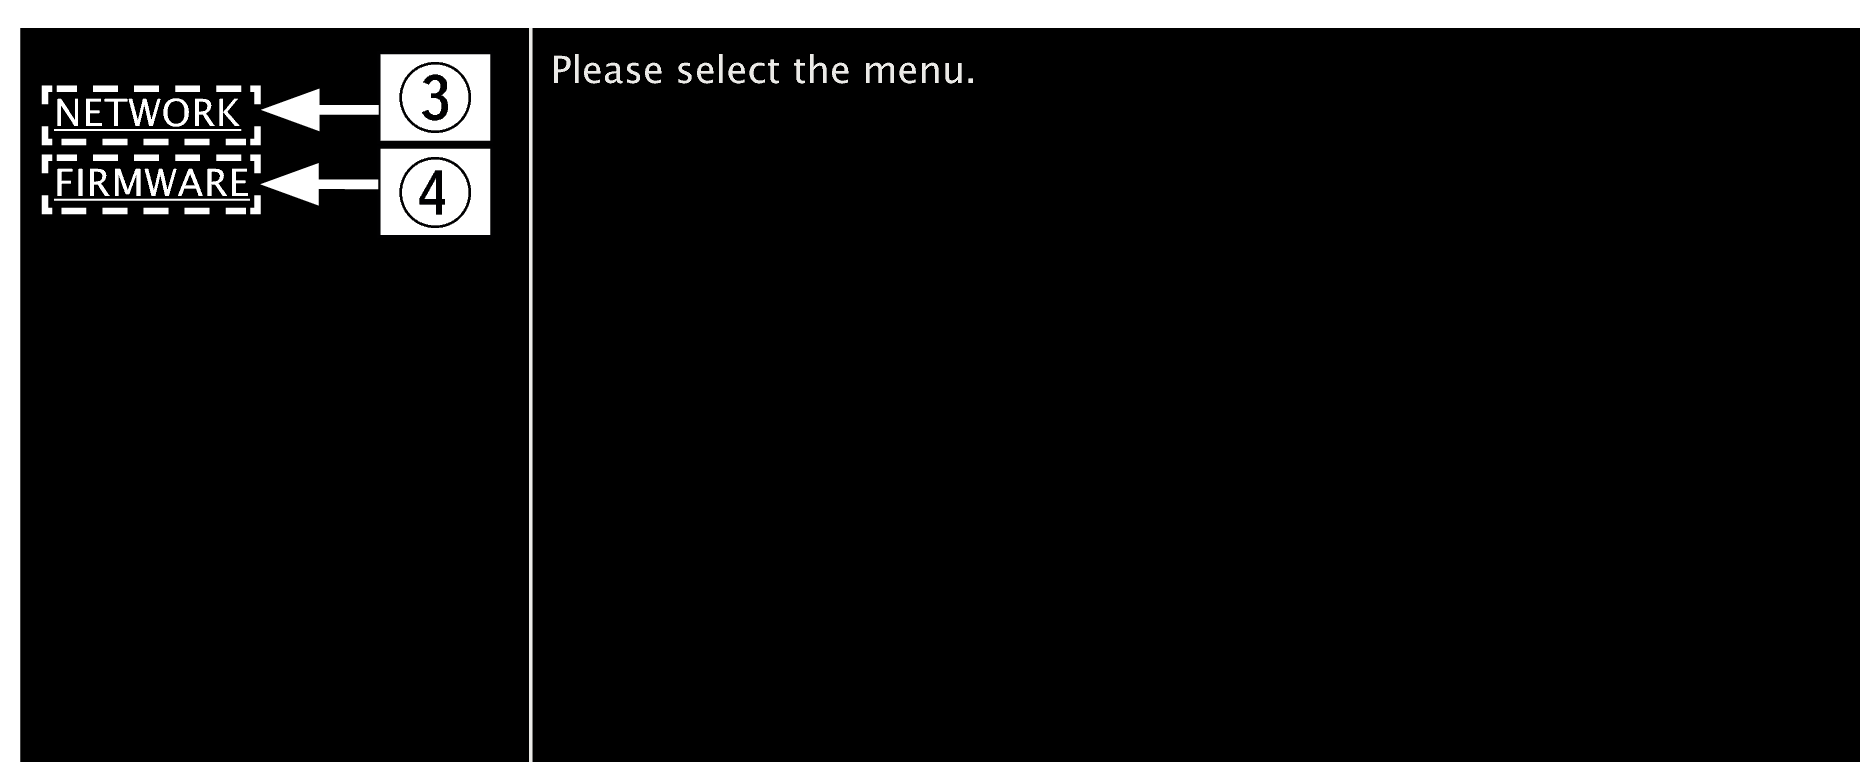
Click when you setup network settings. ( 
 Example 1
  )
)
Example 1 )Click when you update firmware.
Operate.
Example 1 Network Setting 1
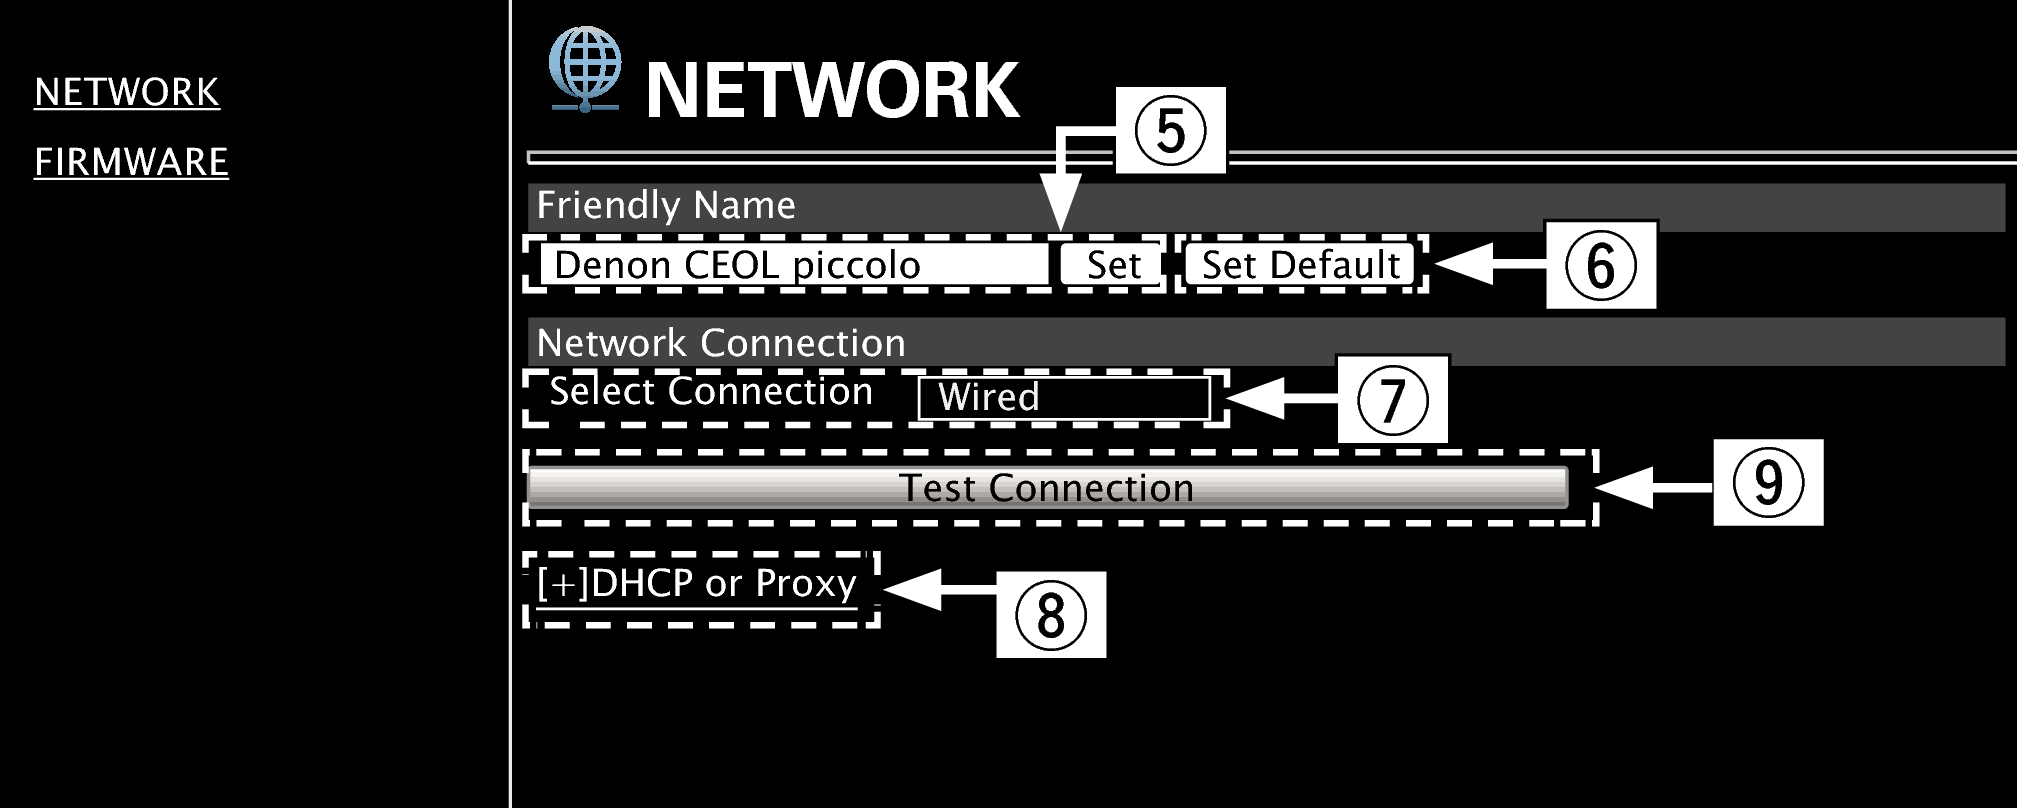
Friendly Name setting
To change the Friendly Name, enter the new name in the text box and click “Set”.
To reset the Friendly Name, click “Set Default”.
Only characters that can be displayed on this unit can be set. link
Network connection settings
Click to change the network connection method. If you select “Wi-Fi”, a new item will appear on-screen. ( Example 2 )
Example 2 )Click to change DHCP/proxy settings. ( Example 2 )
Example 2 )Click to connect using the newly applied settings.
Operate.
Example 2 Network Setting 2
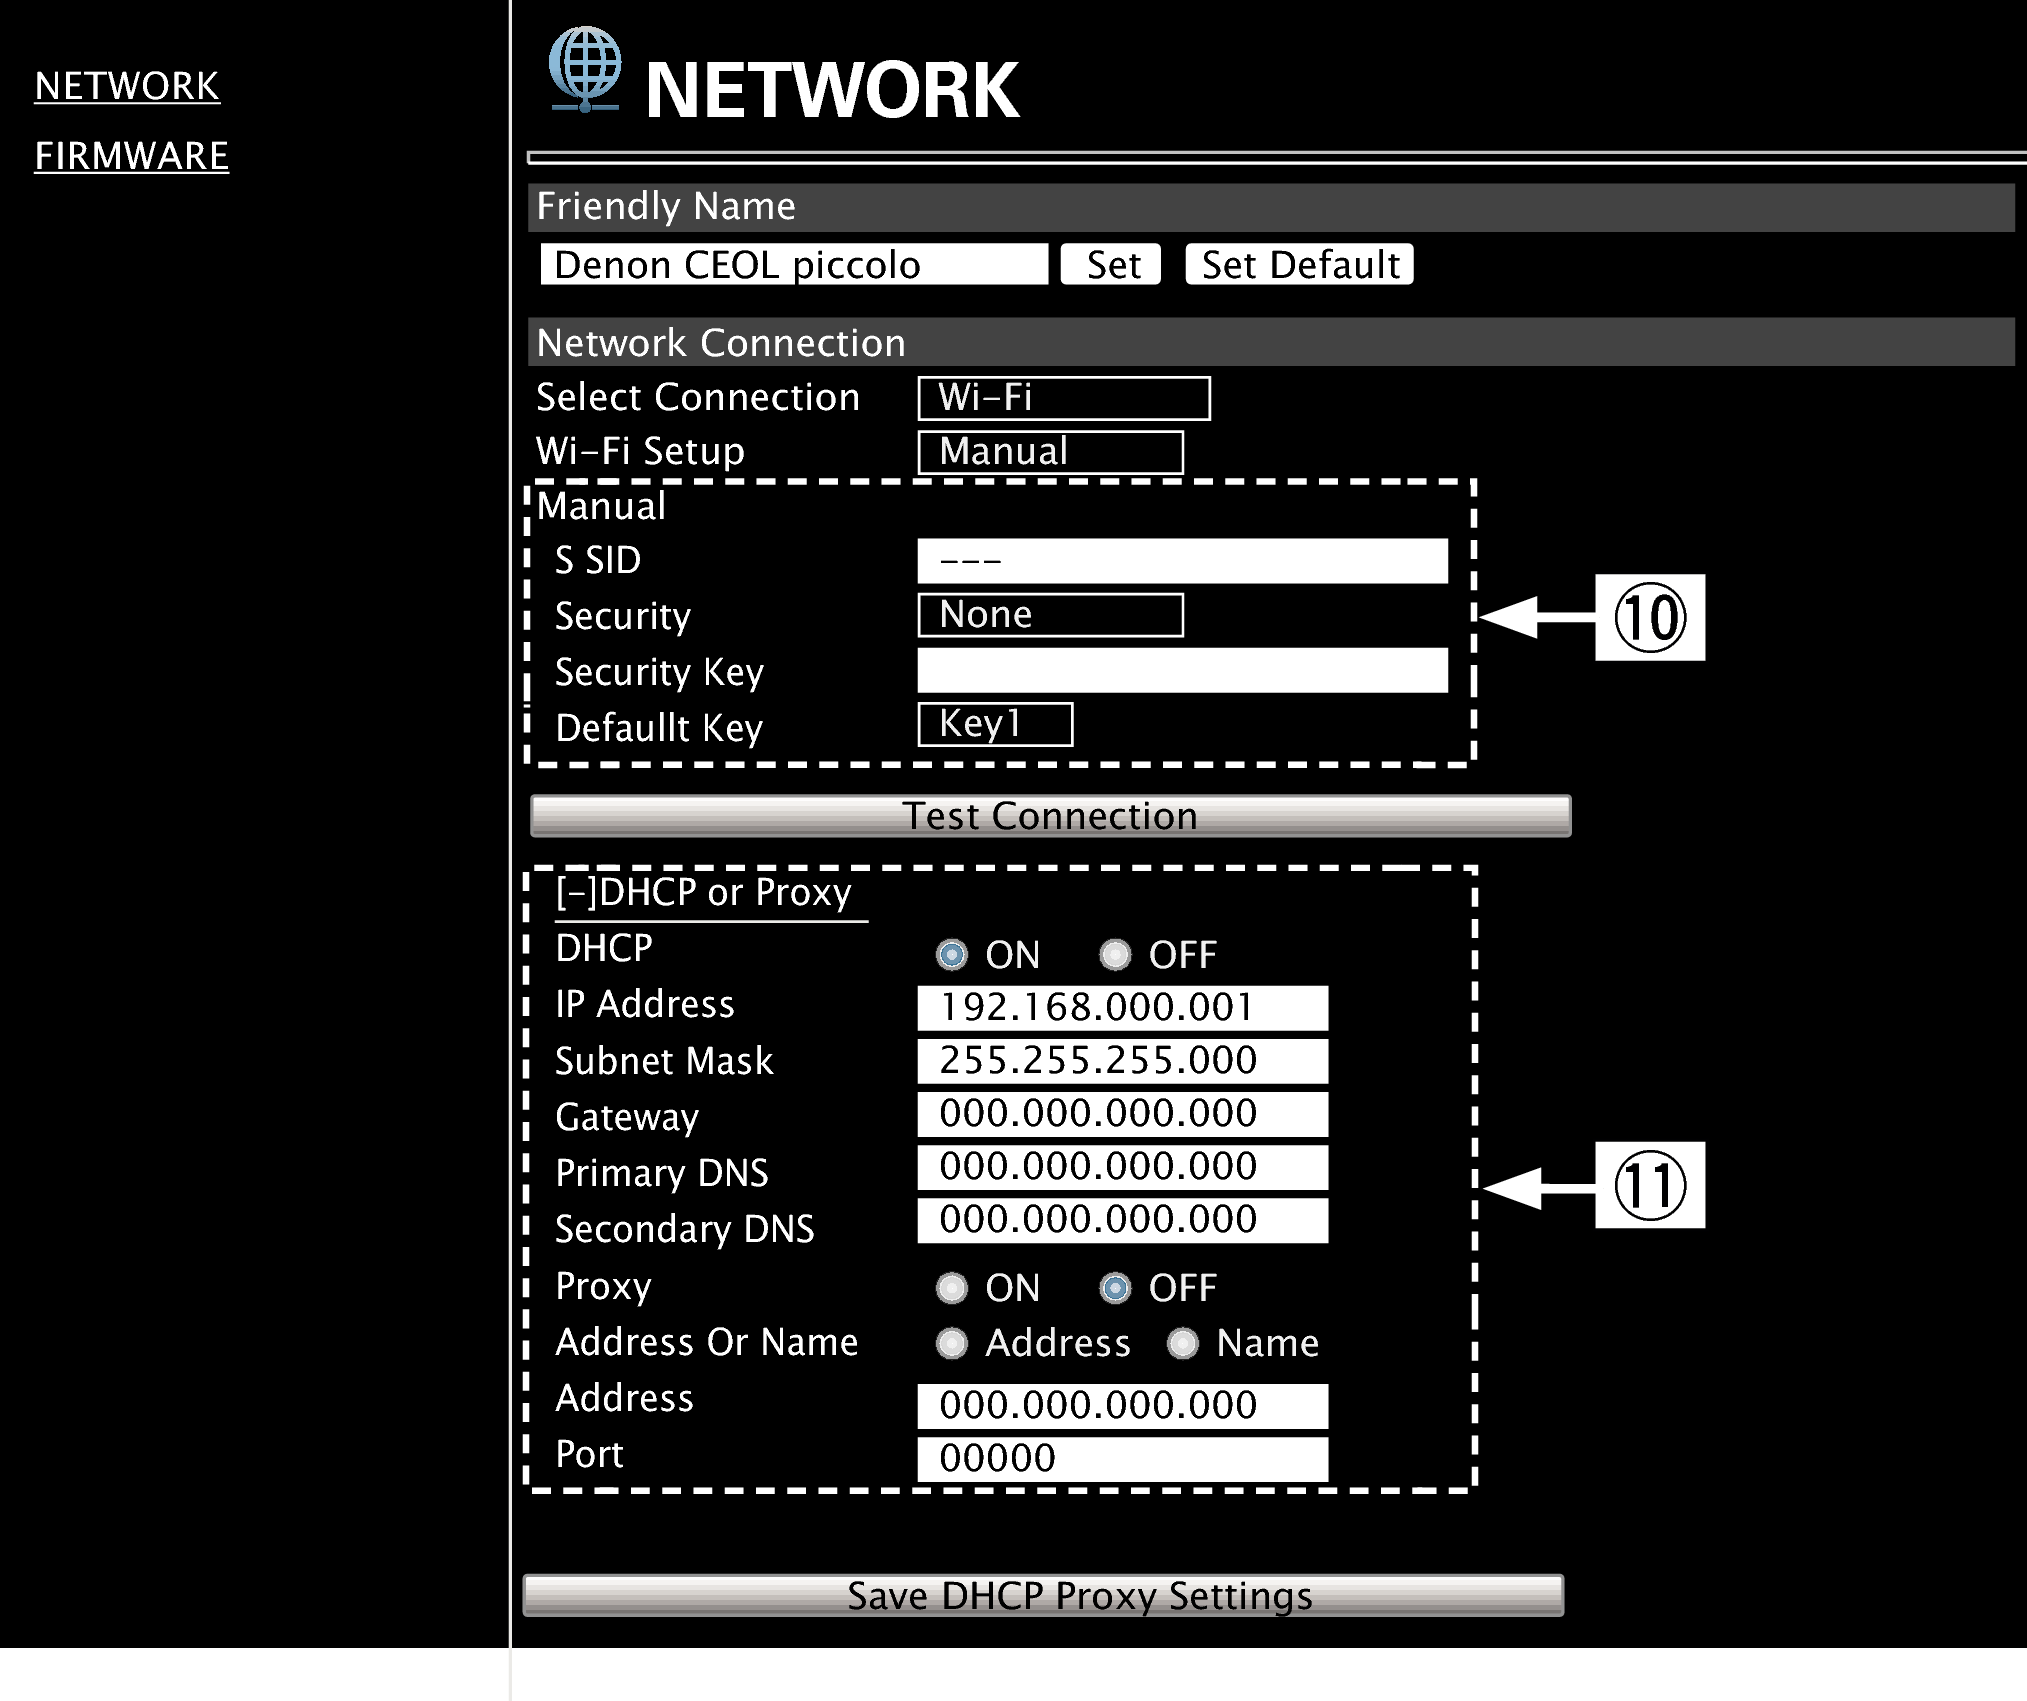
Network connection settings
Example 2 - Displayed when “Wi-Fi” is selected in  . Select or input items as necessary, and then click “Test Connection” to apply the changes.
Items displayed may vary depending on selected items and connection status.
After selecting each item, wait a moment for the display to be updated.
Example 2 - Displayed when “DHCP” or “Proxy” is selected in  . When changing DHCP/proxy settings, input or select for each item.
To apply network connection settings, click “Test Connection” after making changes.
Update on web screen
Web control functionlink settings must be completed in advance on a computer belonging to the same network. For information on obtaining update files, please contact our customer service center.
Click  from step 5 for the “Web control function”. link
from step 5 for the “Web control function”. linkThe PC will display the following screen.
Wait for approximately 1 minute.
You can also gain access by entering the IP address shown by the unit into a web browser.
The web display

The unit’s screen display

When the following screen is displayed by the PC, click the “Choose File” (  ) button, select the update file, and click the “Upload” (
  ) button.
) button, select the update file, and click the “Upload” ( ) button.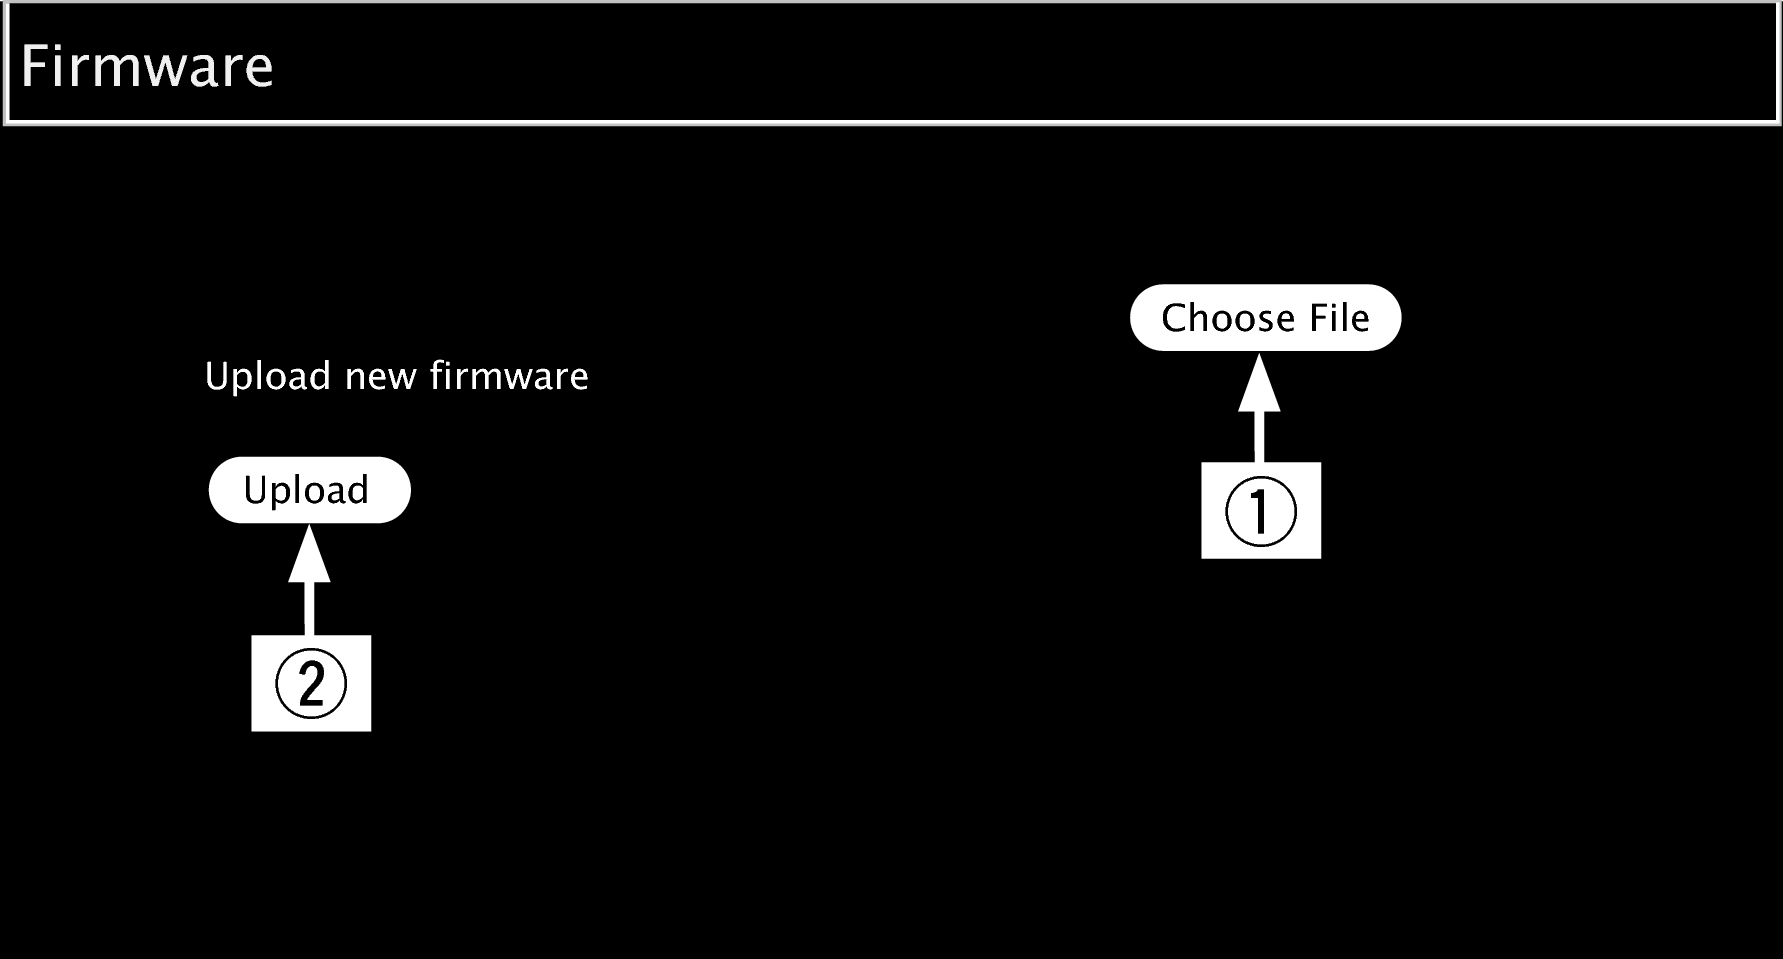
Click “OK”.
Updating will begin.
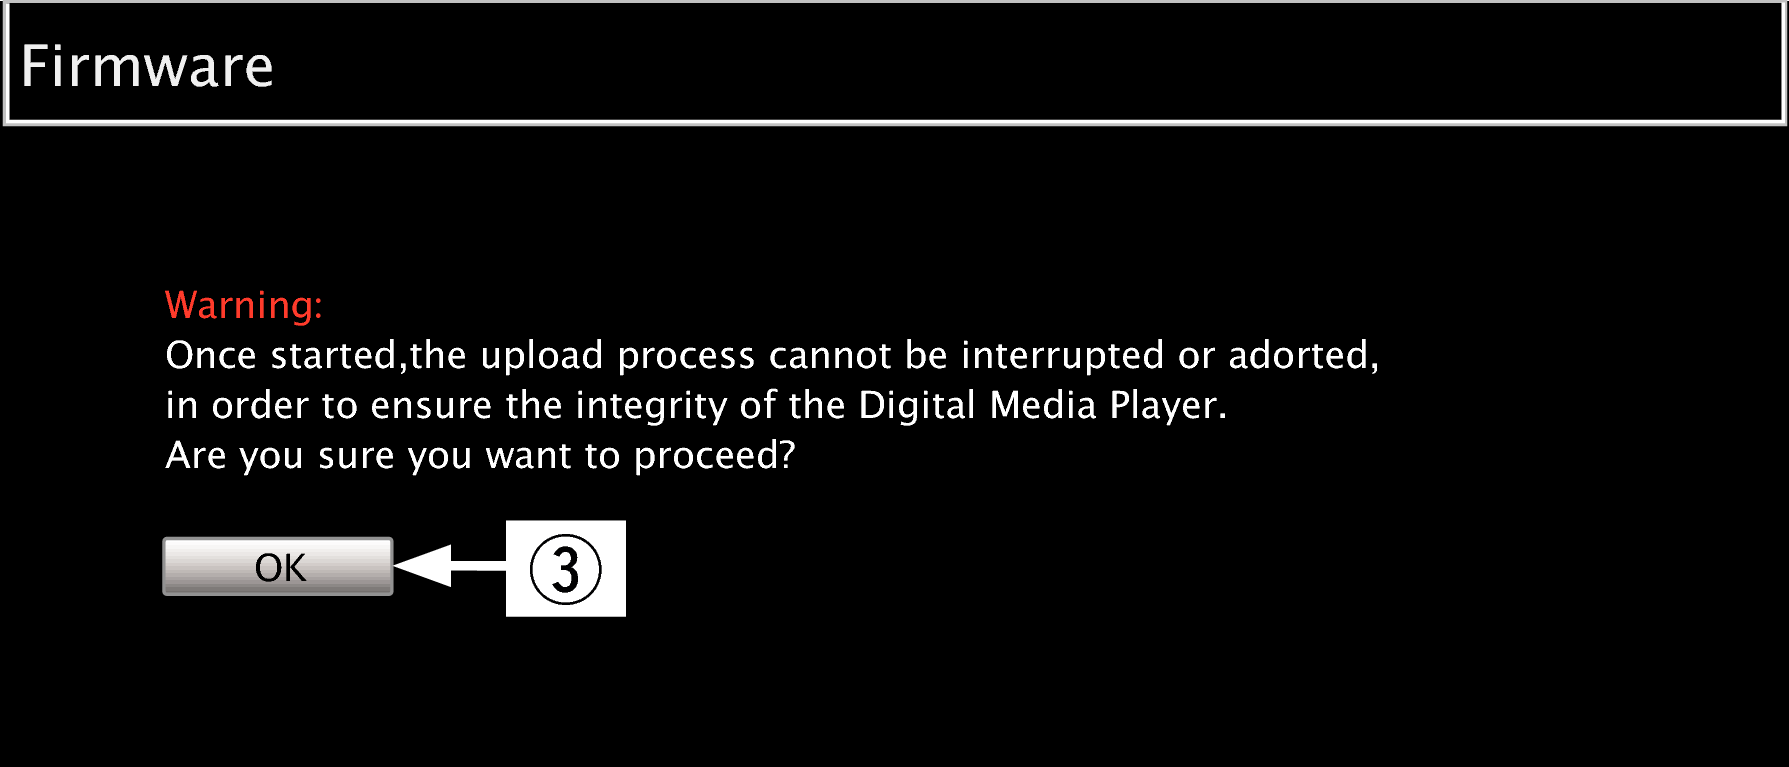
NOTE
Do not operate the unit while updating is in progress.
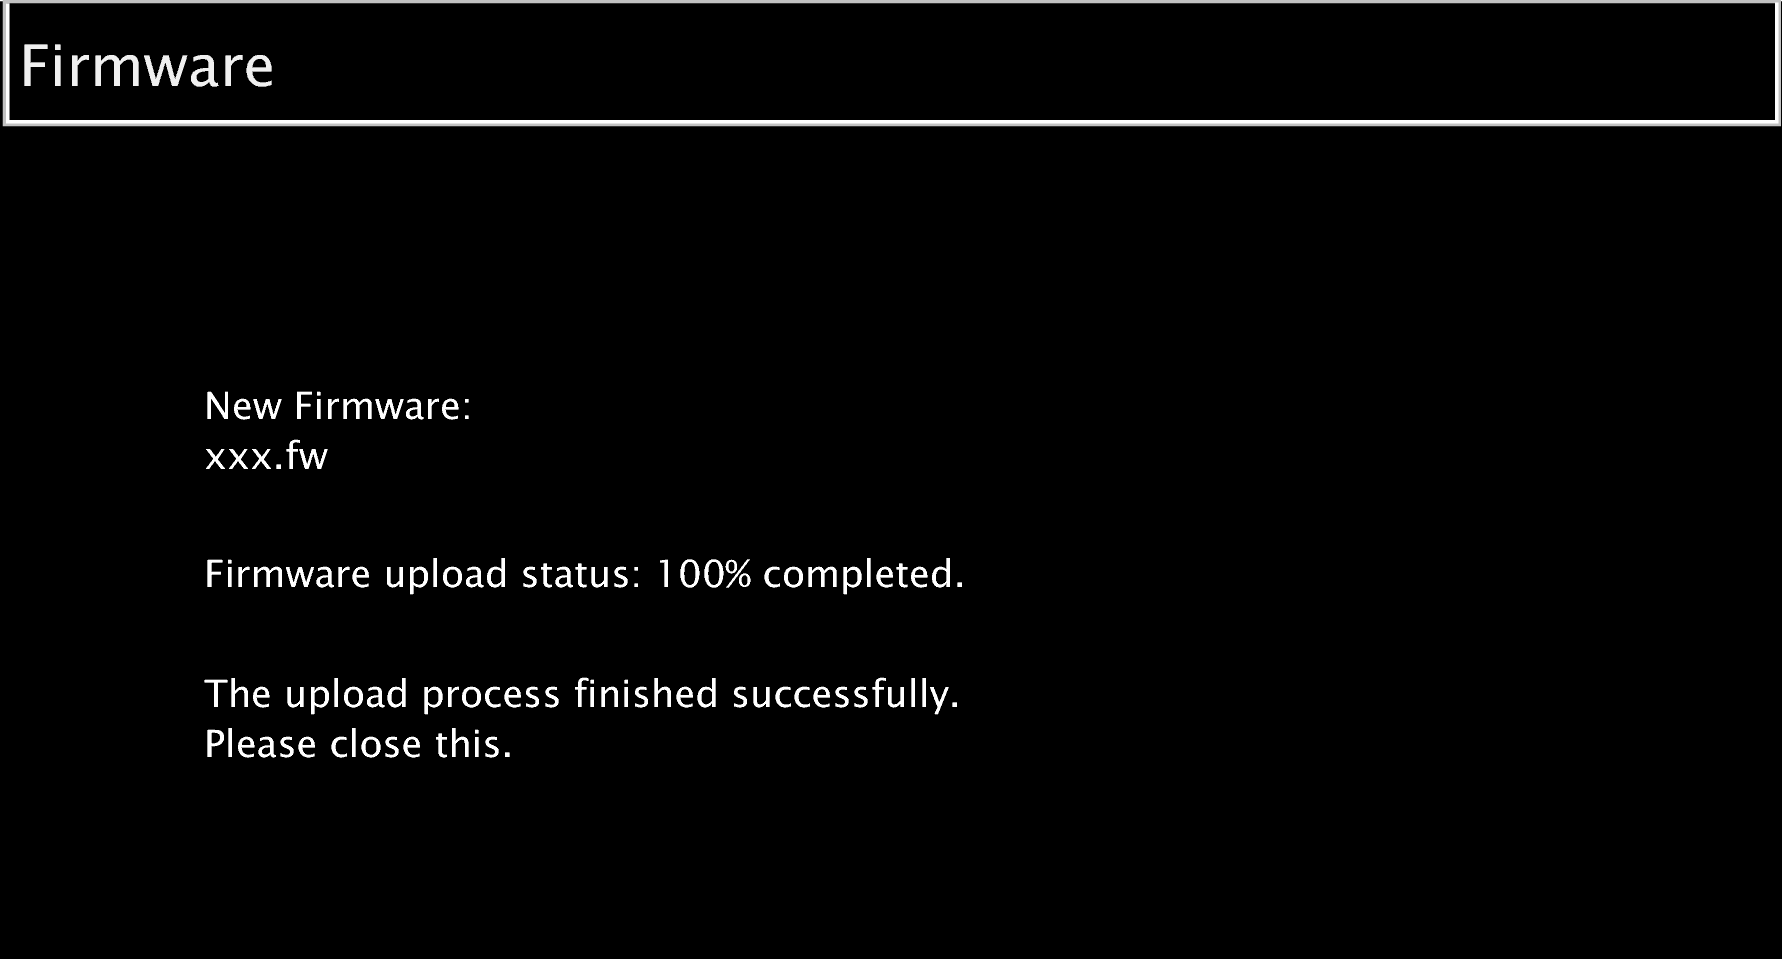
When the following screen is displayed, updating is complete.
Button names may vary depending on the OS language used on your computer.