Search result
Speaker connection
Here we connect the speakers in the room to this unit.
This section explains how to connect them using typical examples.
NOTE
Disconnect this unit’s power plug from the power outlet before connecting the speakers. Also, turn off the subwoofer.
Connect so that the speaker cable core wires do not protrude from the speaker terminal. The protection circuit may be activated if the core wires touch the rear panel or if the + and - sides touch each other. (Protection circuitlink)
Never touch the speaker terminals while the power cord is connected. Doing so could result in electric shock. When the “Setup Assistant” (page 9 in the separate “Quick Start Guide”) is running, follow the instructions in the “Setup Assistant” screen for making connections. (Power is not supplied to the speaker terminals while the “Setup Assistant” is running.)
Use speakers with an impedance of 4 – 16 Ω/ohms.
NOTE
Carry out the following settings when using a speaker with an impedance of 4 – 6 Ω/ohms.
Press and hold the main unit’s  and
and  at the same time for at least 3 seconds.
“  Video Format < PAL>” appears on the display.
Press  on the main unit twice.
on the main unit twice.“ Sp. Impedance <8ohms>” appears on the display.
Use or on the main unit to select the impedance.
|
6ohms: |
Select when the impedance for any of the connected speakers is 6 Ω/ohms. |
|
4ohms: |
Select when the impedance for any of the connected speakers is 4 Ω/ohms. |
Press the main unit’s ENTER to complete the setting.
Connecting the speaker cables
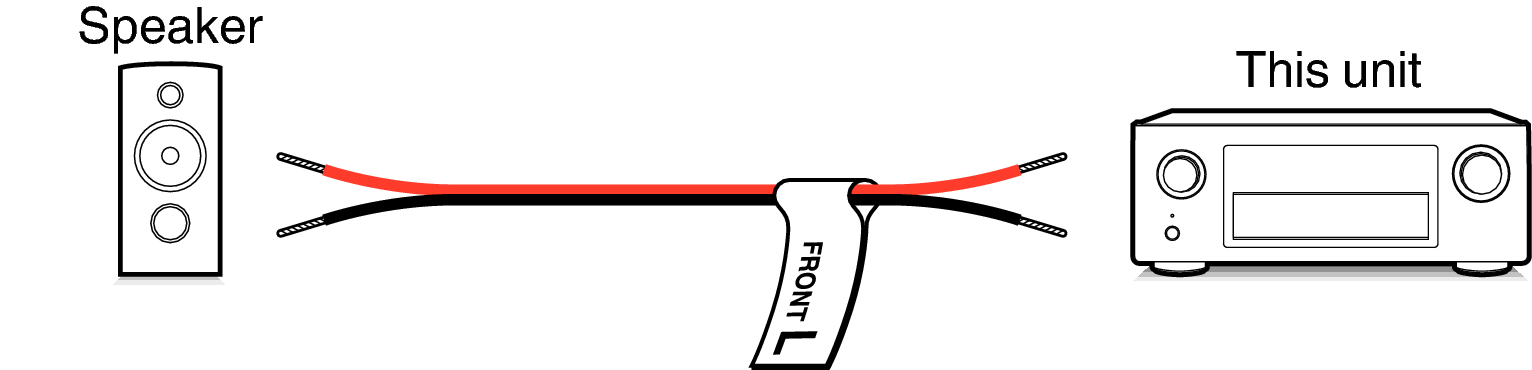
Carefully check the left (L) and right (R) channels and + (red) and – (black) polarities on the speakers being connected to this unit, and be sure to connect the channels and polarities correctly.
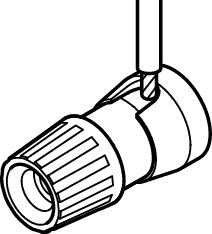
Peel off about 10 mm of sheathing from the tip of the speaker cable, then either twist the core wire tightly or terminate it.

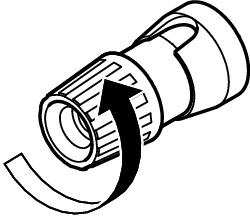
Turn the speaker terminal counterclockwise to loosen it.
Insert the speaker cable’s core wire to the hilt into the speaker terminal.
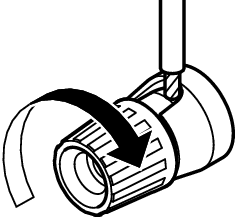
Turn the speaker terminal clockwise to tighten it.
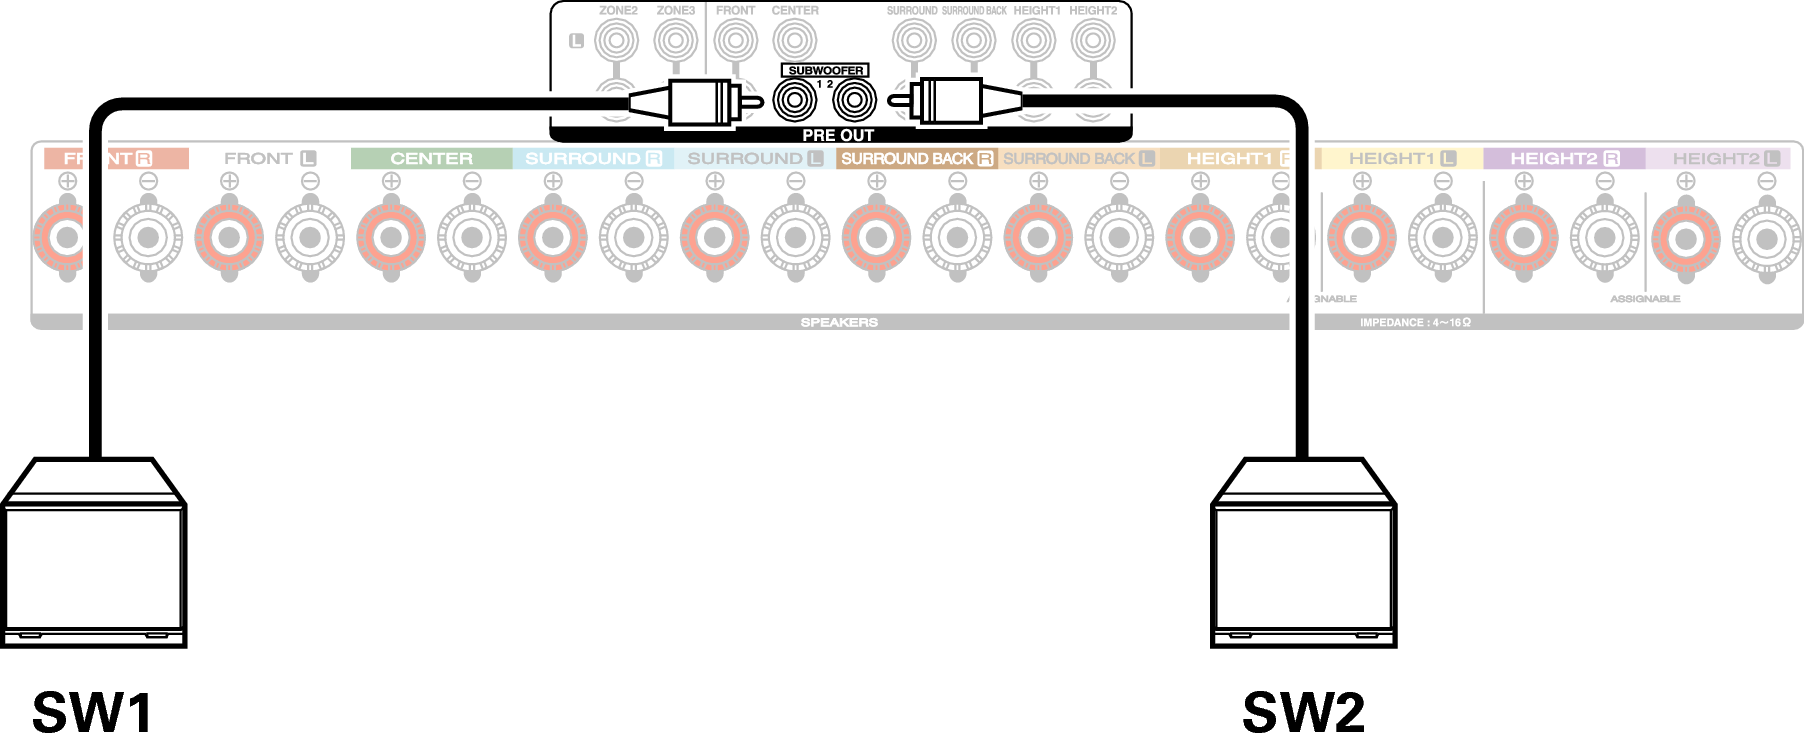
Connecting the subwoofer
Use a subwoofer cable to connect the subwoofer. Two subwoofers can be connected to this unit.
To use two subwoofers, set “Subwoofer” to “2 spkrs” in the “Speaker Config.” setting. link
The level and distance can be set separately for Subwoofer 1 and Subwoofer 2.
About the cable labels (supplied) for channel identification
The channel display section for speaker terminals on the rear panel is color-coded for each channel to be identifiable.
Attach the cable label corresponding to each speaker to each speaker cable.
|
Speaker terminals |
Color |
|---|---|
|
FRONT L |
White |
|
FRONT R |
Red |
|
CENTER |
Green |
|
SURROUND L |
Light blue |
|
SURROUND R |
Blue |
|
SURROUND BACK L |
Beige |
|
SURROUND BACK R |
Brown |
|
FRONT HEIGHT L |
Light Yellow |
|
FRONT HEIGHT R |
Yellow |
|
TOP FRONT L |
Light Yellow |
|
TOP FRONT R |
Yellow |
|
TOP MIDDLE L |
Light Purple |
|
TOP MIDDLE R |
Purple |
|
TOP REAR L |
Light Purple |
|
TOP REAR R |
Purple |
|
REAR HEIGHT L |
Light Purple |
|
REAR HEIGHT R |
Purple |
|
FRONT DOLBY L |
Light Yellow |
|
FRONT DOLBY R |
Yellow |
|
SURROUND DOLBY L |
Light Purple |
|
SURROUND DOLBY R |
Purple |
|
BACK DOLBY L |
Light Purple |
|
BACK DOLBY R |
Purple |
|
SUBWOOFER |
Black |
Attach the cable label for each channel to its speaker cable as shown in the diagram.
Refer to the table and attach the label to each speaker cable.
Then, make connection so that the color of the speaker terminal matches that of the cable label.
 How to attach the cable labels