Search result
Adjusting the stylus pressure
To enable the record stylus to follow the grooves of the record and pick up sound (vibrations), it is necessary to apply a constant pressure (stylus pressure) to the record from the stylus tip. A suitable stylus pressure value is specified for each cartridge. If the stylus pressure is higher or lower than the specified value, not only will the record playback sound be distorted and the stylus jump, but the record stylus may wear out faster and the record may become damaged. Therefore, make sure to adjust the stylus pressure to the suitable value.
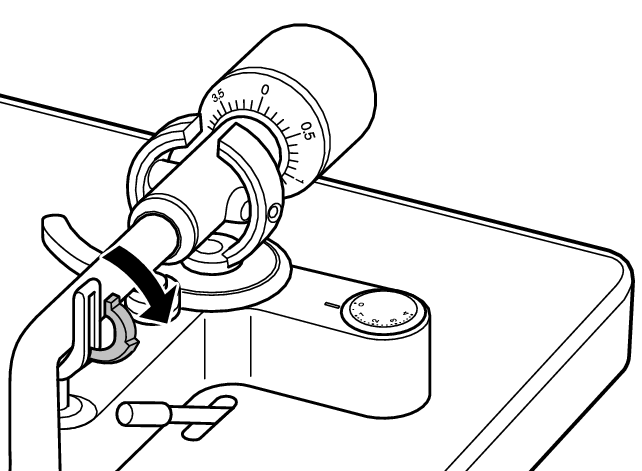
Set the anti-skating dial to “0”.
Lower the lifter lever.
Release the armrest lock.
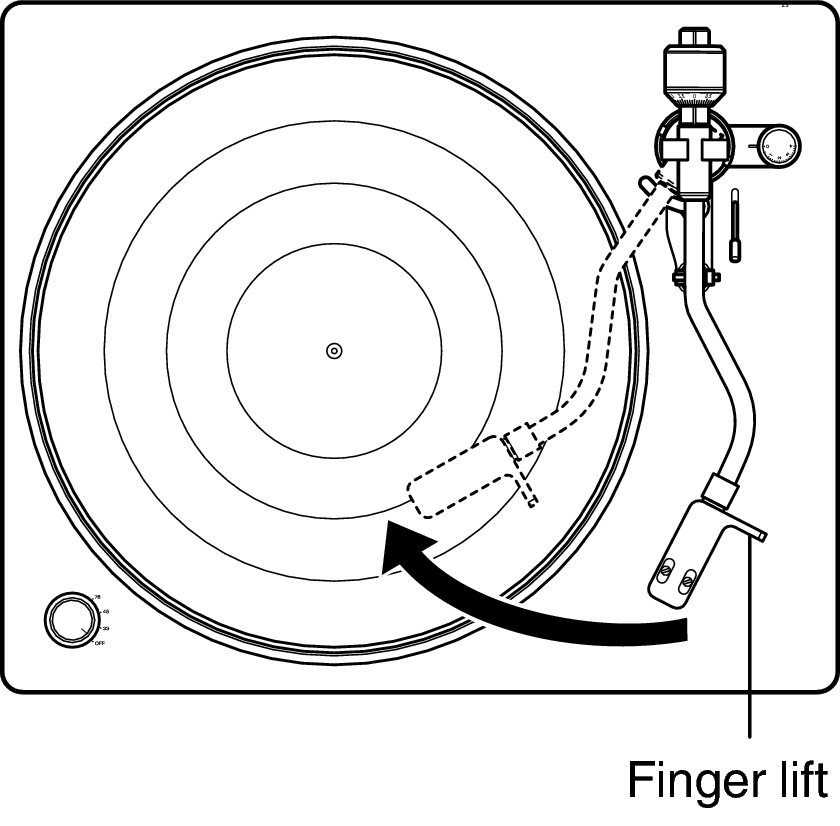
Holding the finger lift of the headshell, move the tone arm over the turntable.
NOTE
Perform this operation with the stylus cover of the cartridge lowered to protect the stylus tip.
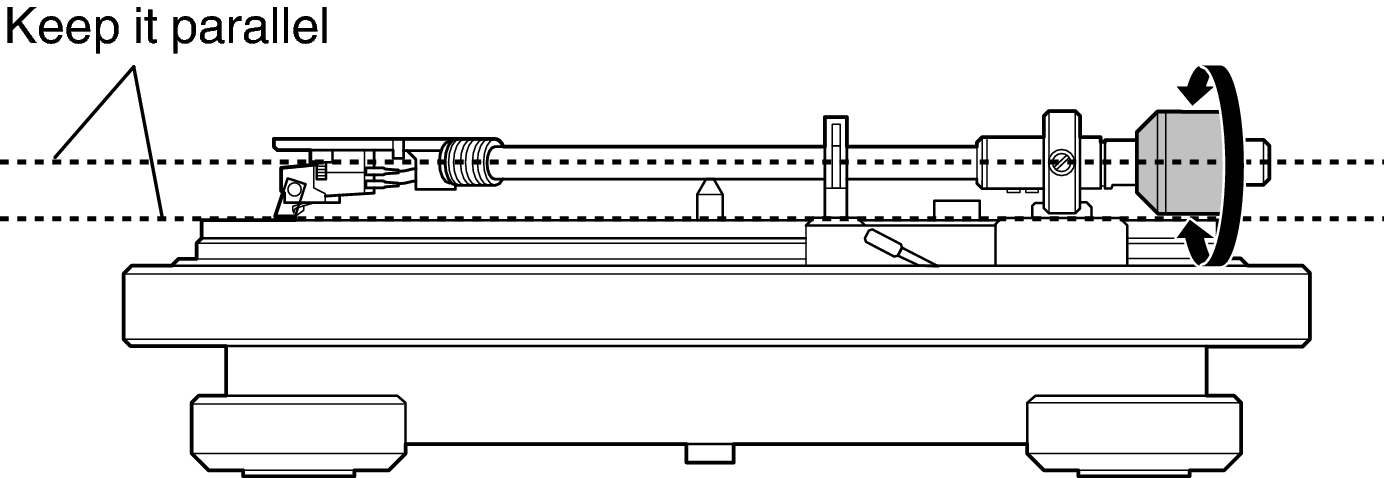
Turn twist the counterweight so that the tone arm is floating parallel to the turntable.
Perform adjustment by turning the counterweight gradually while periodically removing your hand to check the position.
Return the tone arm to the armrest.
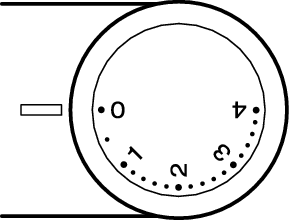
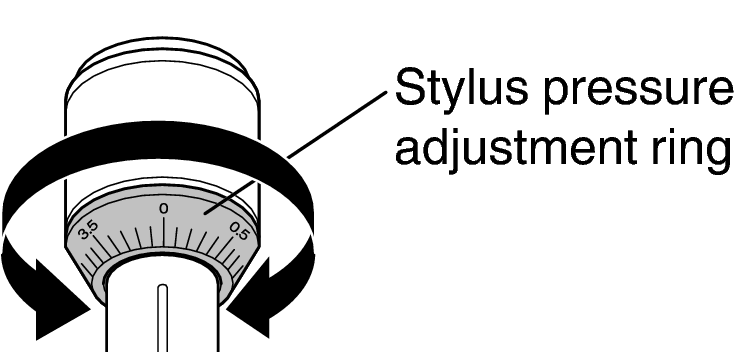
Holding the counterweight with a finger so that it does not move, turn the stylus pressure adjustment ring so that its “0” mark is lined up with the line on the tone arm.
Turn the counterweight in the direction of the arrow so that the “2” mark of the stylus pressure adjustment ring is lined up with the line on the tone arm.
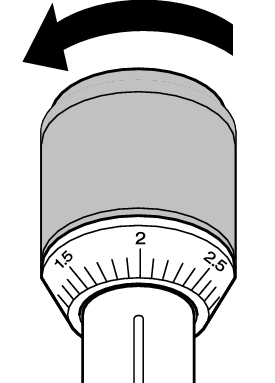
The appropriate stylus pressure for the cartridge included with this unit is 2.0 g (19.6 mN).