Search result
Mounting the cartridge
Attach the head shell to the cartridge (not included) loosely.
Refer to the display or manual of the cartridge you are using and ensure that the lead wire is correctly connected to the terminal of the cartridge.
To adjust to overhang, temporarily fix the cartridge so that it can be moved.
NOTE
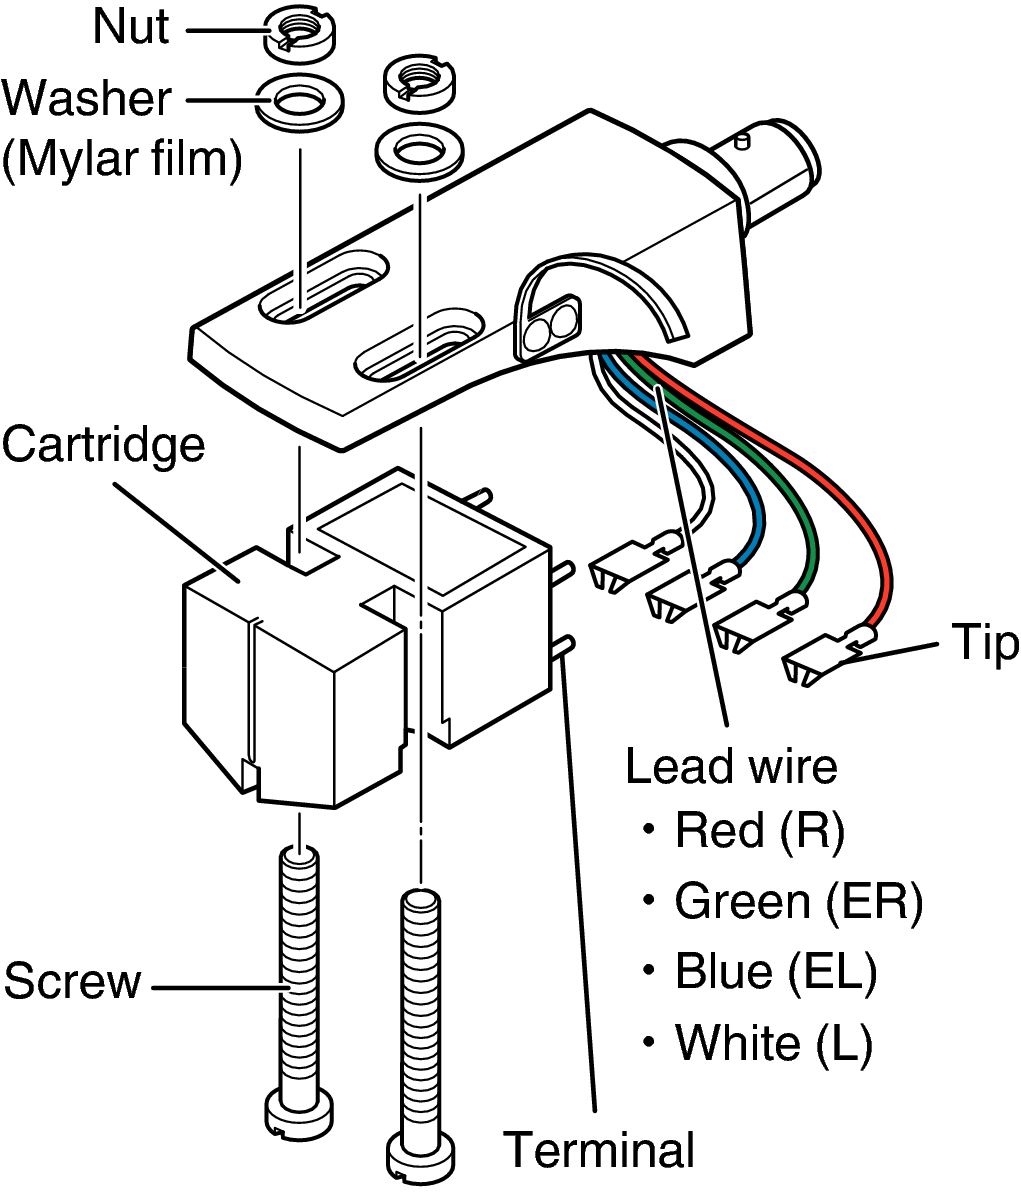
Use the included screws, nuts, washers and screwdriver.
Do not touch the stylus.
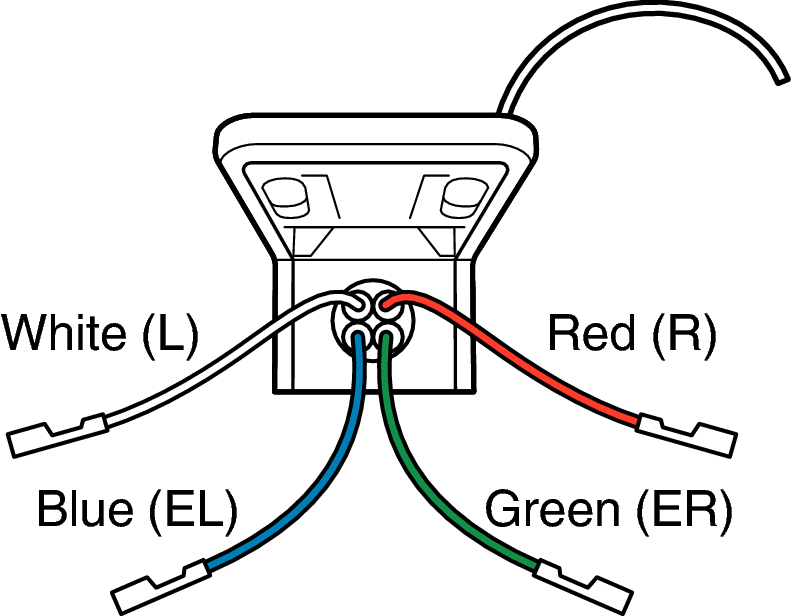
If the lead wire on the head shell is disconnected, connect the tip of the lead wire to the terminal, as shown below.
The included lead wires can be replaced with commercially available lead wires.
Adjust the overhang and then securely fasten the cartridge to the head shell.
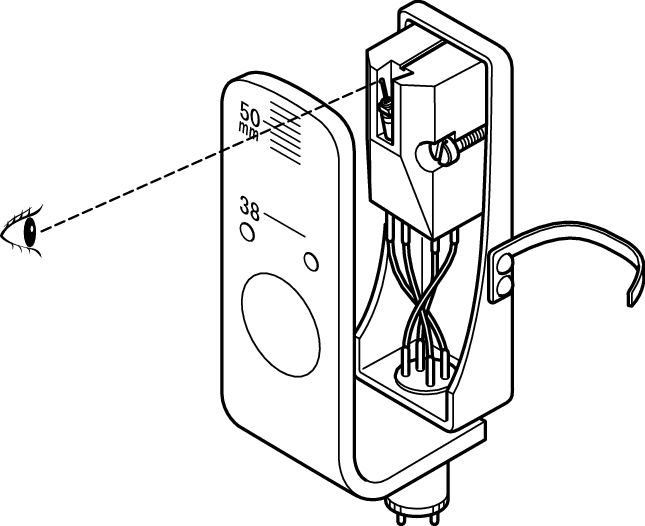
Mount the overhang gauge (included) to the head shell.
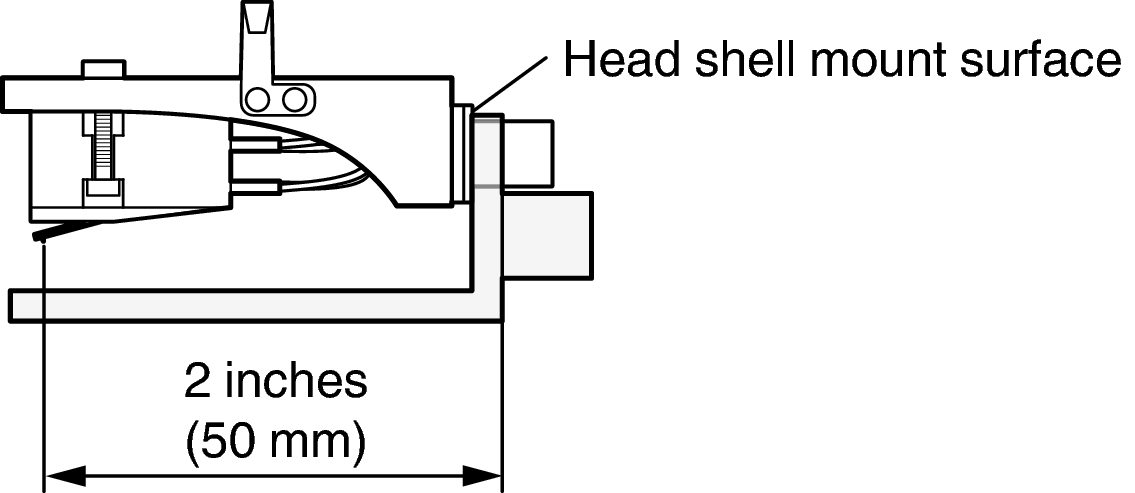
Adjust the position of the cartridge so that the stylus is at the 2 inches (50 mm) point of the overhang gauge.
2 inches (50 mm) :This is the distance at which the stylus tip traces the left and right channels with optimum balance according to the positioning of the platter and tone arm. (overhang value)
Tighten the screws with a screwdriver to secure the cartridge to the head shell.
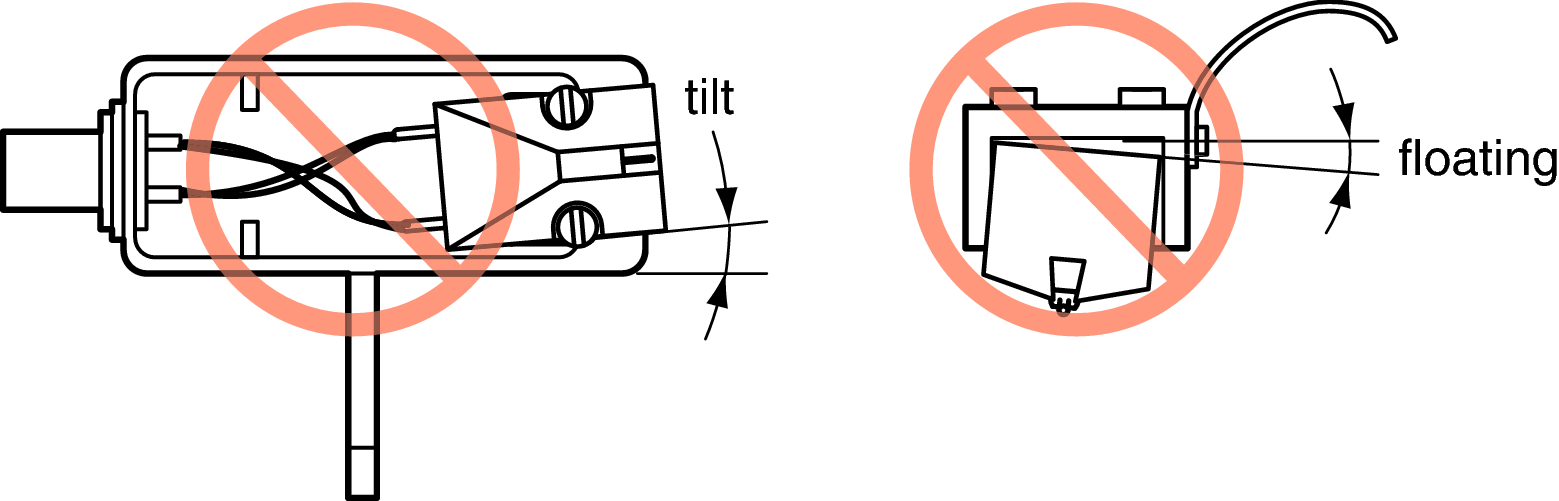
NOTE
Mount the cartridge with no tilt or floating so that the stylus tip can trace the groove on a record correctly.