Search result
Hanging the sound bar on a wall
The sound bar can be mounted on a wall using the two keyholes provided on the back of the bar for this purpose. When hanging the bar on a wall, position it in a flat, vertical position.
To ensure safety, it is best to employ a contractor to mount the sound bar on the wall.
NOTE
In order to use the unit safely, do not place items on or hang items from the unit.
Do not attempt to install the sound bar onto a wall made of material that may crumble easily, such as mortar or decorative plywood. Doing so may result in the screw pulling out and the sound bar falling, causing injury or damage to the sound bar.
The included HDMI cable have ferrite cores. When hanging the sound bar on a wall, make sure not to put the ferrite core between the sound bar and the wall.
Be sure to fix connection cables to the wall to ensure that the cables cannot be pulled or tripped over, which may cause the unit to fall. Check that the unit is mounted safely after the mounting work is complete.
Also, periodically check that the unit is mounted solidly and that there is no possibility that the unit could fall.
Denon cannot accept any responsibility for damage, injury or accidents caused by problems with the mounting location or mounting method.
|
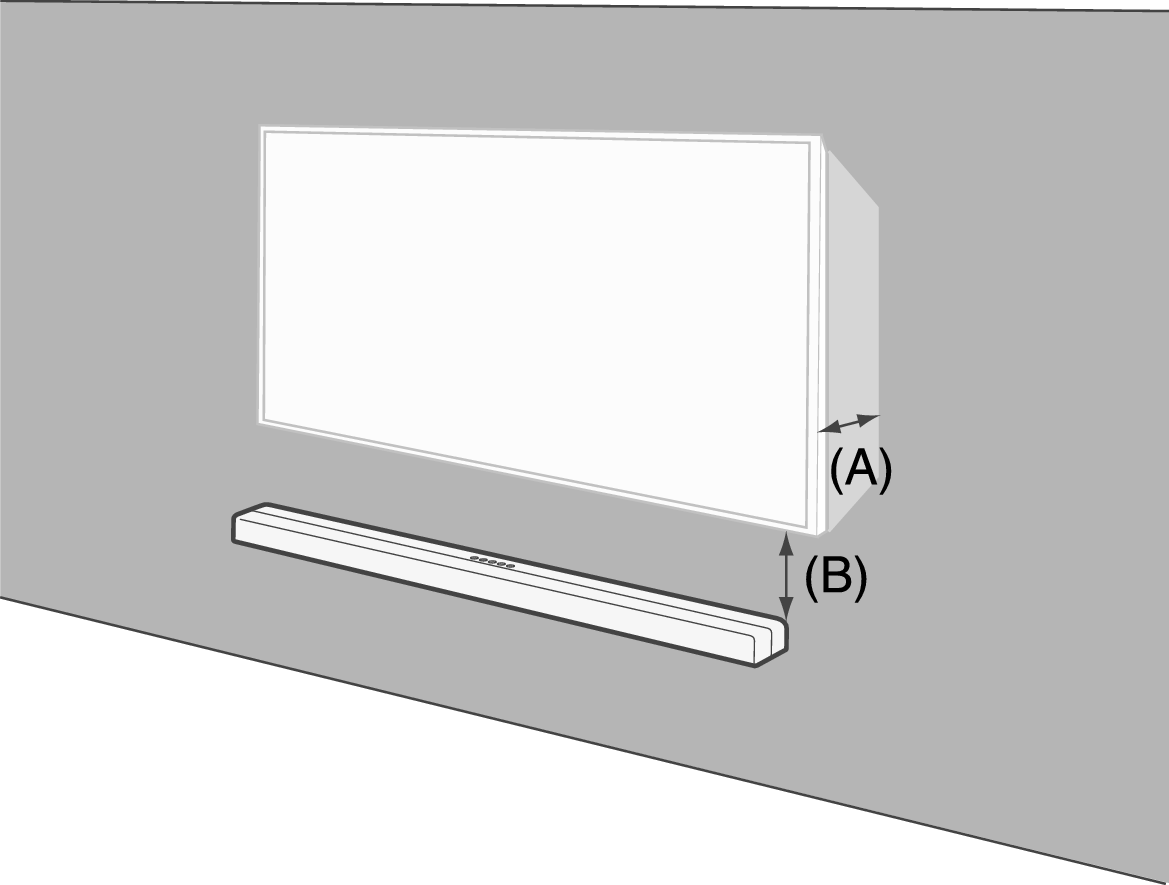
(A) Depth of the mounted TV |
(B) Required space between the bottom of the TV and the top of the sound bar |
|
Less than 64 mm |
More than 50 mm |
|
64 – 102 mm |
More than 102 mm |
|
More than 102 mm |
More than 191 mm |
When hanging the sound bar on a wall, use the included wall mount template.
How to use the wall mount template
Tape the template to the location you would like to mount the sound bar.
Leave enough space between the TV and the sound bar so that the sound from the Atmos speakers on the top of the bar, which projects towards the ceiling, is not blocked by the TV. Refer to the table on the previous page for spacing recommendations. link
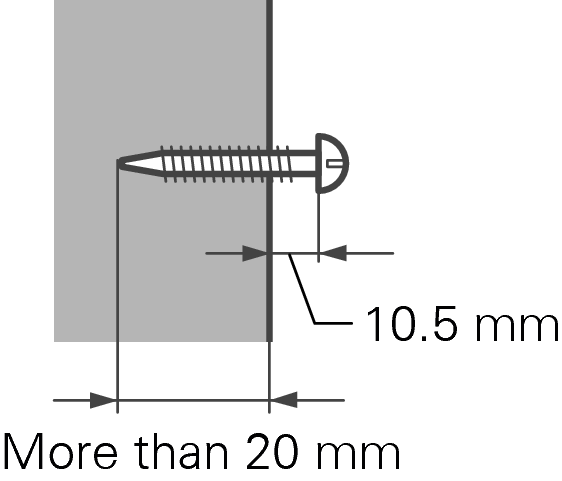
Screw in the wall mount screws by following the template.
Screw in one self-tapping screw (commercially available, 5 mm to 6 mm diameter) into a wall that has sufficient strength to support the weight of the sound bar, or into reinforcing material on the wall.
Remove the template from the wall.
Mount the included wall mount spacers on the back of the sound bar.
The wall mount spacers create a space for cords to pass through between the sound bar and the wall.
Hang the sound bar on the screws.